How to Create Simple Decor Vignettes
It may sound out of character to those who know me well in real life, but one of my favorite things about decorating is that it truly is experimental, imperfect, and the beauty is up to the beholder. I tell people all the time…if you love it, then it’s perfect for your home!
At the same time, I totally understand the feeling of looking at someone’s décor or style and thinking “I have no idea how to do that!”
If you’ve ever felt that way too, I’m here with good news. You don’t have to “do it that way.” You get to decide what you love for your home, how you like it styled, play around with it until you love it, and then just enjoy it!
Then there is the teacher/student part of me that loves to learn. I love to study décor, paying careful attention to details that make me smile, then go about experimenting with my own décor! That’s what I hope today’s blog post is for you…
A chance to study the décor, gather some ideas, then experiment with your own décor until you love it!
")
I think we can so often get stuck in a mindset of “big changes” in our homes. That’s the other good news for today! It’s fun to have big renovations, build a new home, gut and remodel a room, or even redecorate a whole room.
But the fact of the matter is, most of us are just looking for simple ways to keep loving the home and décor we already have. I hope today’s blog post gives you some fresh ideas…and I want you to start with the décor you already own!
")
I always like to link up some styling favorites for you, but before you buy anything, take a look around and shop your own home! I guarantee you can get a really great start, right at home!
Today, we are looking for simple, easy décor ideas. I love creating vignettes and sometimes when I’m feeling a little restless in a space, just changing one vignette gives some life and new love to a room!
Here are a few rules of thumb I like to go by when thinking about refreshing a space with a vignette:
Start With a Base
Every. Single. Time. Maybe I get a little too hung up on this, but when I try to build a vignette without something to ground it, something to pull it all together, I literally NEVER end up liking it!
But when thinking about a base to ground your vignette, there are so many creative ways to go about doing that! Does anyone remember when doilies were all the rage? Am I totally dating myself here??? I remember that my mom had a stack of them and used them all over the house. Honestly, they are still a design element of choice for the true, primitive décor styles.
You’ll often find me using an old breadboard (which helps me totally justify how many of those I have!), a dough bowl, flat basket, grain sack, wooden tray, wire basket, architectural salvage, or some kind of a combination of a couple of those!
")
I recently picked up a large, wire basket at Rehab Vintage Market. It’s all bent and rusted from time (which is why I love it!) and my new favorite vignette base is to use that with with my Belgian bread board from Dreamy White Lifestyles. The bread board gives a stable base inside the wire basket, upon which I can add favorite items!
So get creative with your base! You might set a wooden tray on an old breadboard for an extra layer. Or lay a vintage linen piece inside a flat basket. I like to use simple things like this to create an extra layer for my vignette. Often, it’s that extra little layer that ends up being my favorite thing about the vignette! It’s all in the details!
")
You can even refresh a vignette simply by switching the base. This I why I like to keep a variety of things like bread boards, trays, crates, baskets, and architectural salvage around. I don’t have many of them “stored away”, but rather switch them around in my vignettes.
Everyone has time for a 5 minute refresh! Look around and see what vignette you can refresh simply by switching the base! (It might turn into more than 5 minutes because I think you’ll end up having so much fun that you switch more than one!
If you’re still working to build your collection of bases, you can read about some of my favorite vintage hunting tips HERE.
The Décor Triangle
There is probably some official name for this somewhere in the décor world! When building a vignette, the décor triangle is a really good place to start. You want to think of the décor as a set of three items, at three varied heights, with the tall and medium staggered a bit and the shortest item completing the point of the triangle in front.
Let’s practice! Pause your reading and find three different sizes of jars or drinking glasses from your kitchen.
See how easy that is? This is why I almost always buy décor in sets of 3. OR, if I’m using a pair of something, the same size (such as candlesticks), I place one of them on a stack of books so that I get a third height.
Play around with this triangle in your décor. This is a great spot for all the mathematicians to try and figure out the names of all these triangles, because they are going to be very irregular, very imperfect, and have lots of variety. In fact, if every vignette throughout your home has the same exact triangle, it’s going to start looking a lot like a staged home and a lot less like well-curated collections of your favorite décor!
But if the décor triangle is new to you, just start with that. You’ll quickly get accustomed to starting your vignettes in this trio and then you can get more and more creative with it!
")
Mixed Materials
There is no hard and fast rule for this, so I’m just sharing my personal opinion and preferences here! This is what I was referring to earlier; the beautiful thing about décor is that it can be just what YOU want, not what a book, blog, or social media world says you have to do!
When building a vignette, I look for ways to mix materials. This gives more texture and often, more character, to my vignette. That being said, it’s less likely that you’ll love a group of random things, even if they are in a décor triangle!
I like to have a common thread that connects each of the items, which can be through color, material, or pattern. Since I use a lot of neutrals, this is a little easier, particularly when mixed with my woods and whites
")
Here are a few examples of items I might mix together for a vignette:
- Stack of vintage books in neutral tones, white planter with a plant, and a set of two wooden candlesticks.
- Architectural salvage corbel (chippy white, of course!), vintage books in neutral tones, white planter with a plant
- Zinc bucket with a tree, white ironstone pitcher, wood pedestal with a white candle
- White ironstone pitcher with flowers, wooden pedestal with stack of ironstone plates, white planter with fresh plant
- Wooden pedestal with large white planter/plant sitting on top, small brass planter with plant, white candle
Do you see all of the repeated items used above?
This is why I shop my house and encourage you to do the same! I also like to invest in décor pieces that I can mix and match with several different things, in varying rooms of my home. This is also why I say you can easily just switch and item or two, get an entirely fresh look, and be enjoying it in 15 minutes or less!
I love the big decorating projects, but these simple, little resets truly make me feel so happy with our home!
Tell a Story With Your Room
This could really be a whole blog post all on its own (so maybe I’ll work on that soon!), but vignettes are an important way to add to the story of your room. Make them personal by using some of your favorite things. You’ll start to see repeated threads that give a visual connection throughout the room.
Have a vignette with a wooden pedestal and ironstone pot sitting on top? Create another vignette in the room with a wooden bread board and ironstone pitcher, holding flowers. See the commonality without “matching”? That kind of detail adds an element of thoughtfulness and intentionality to a space!
")
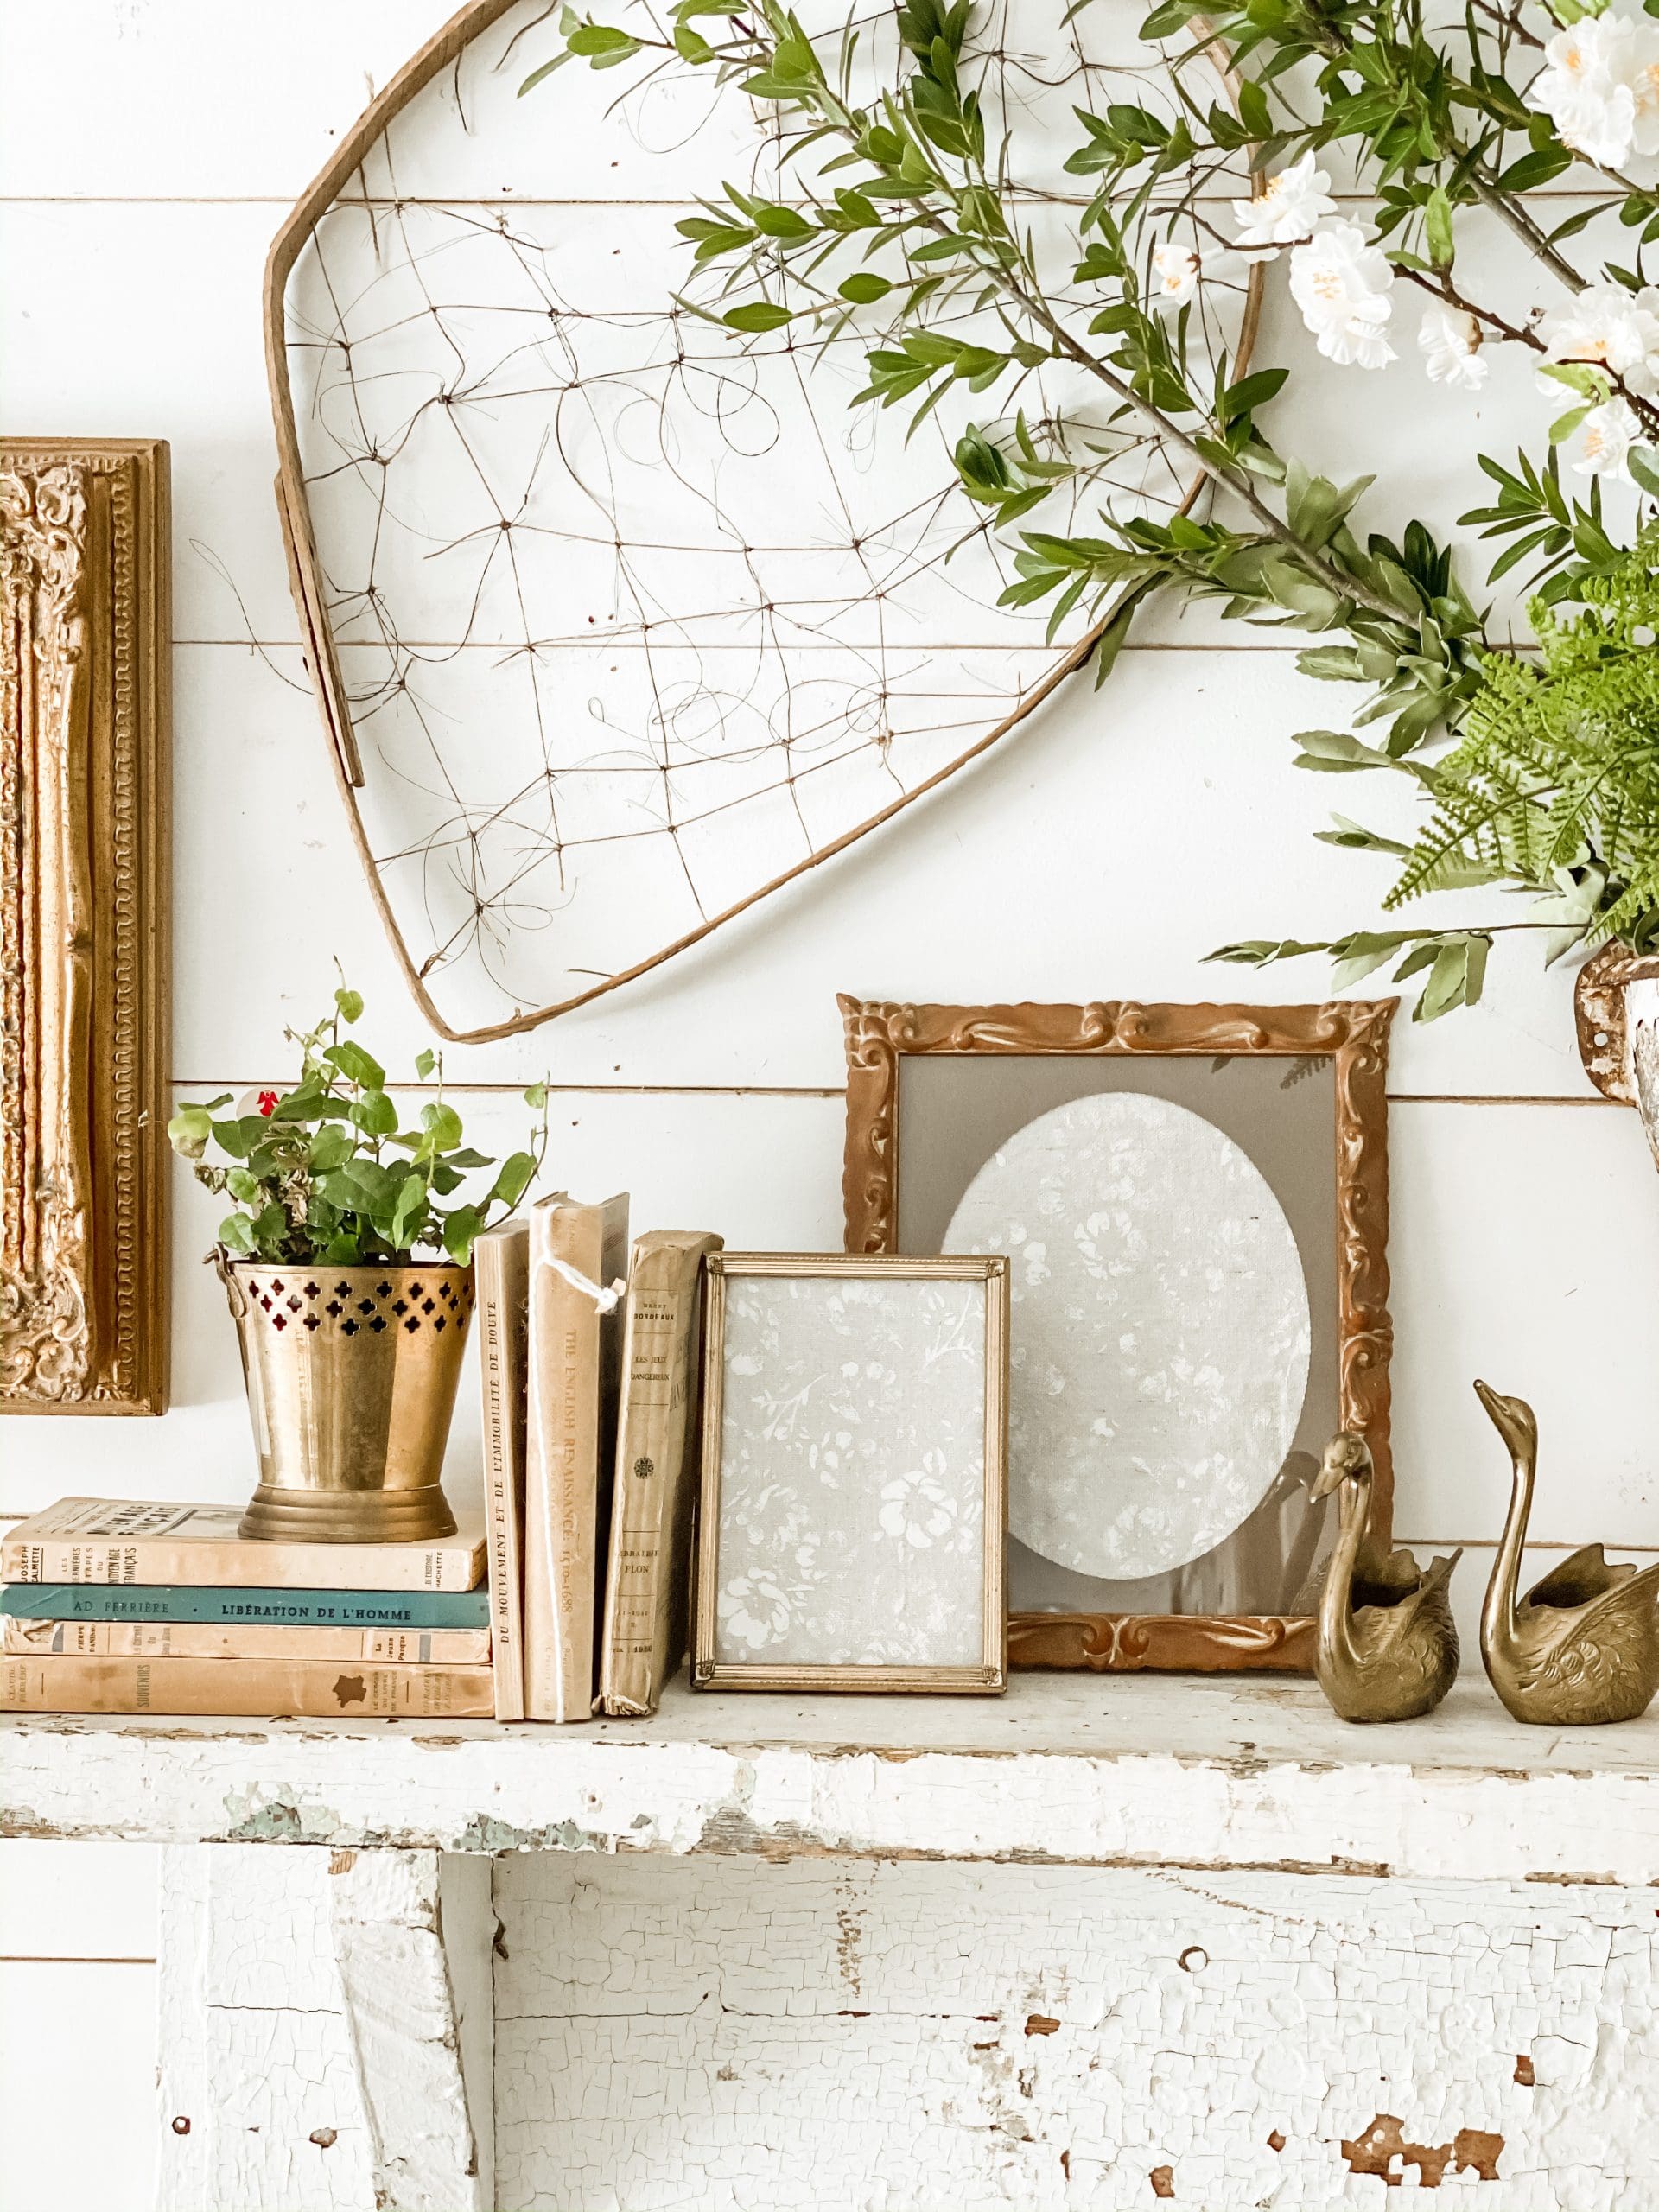
For the spring, I love adding a touch of the Audubon style by adding some pages from my Birds of America book to some vintage, gold frames. You can see more about that gallery wall HERE. So in my vignettes throughout our living spaces, I looked for ways to tuck in some little vintage, brass swans and a favorite thrifting find with my vintage, brass bird candlesticks.
The space doesn’t scream “BIRD THEME”!!!!! (At least, I don’t think it does! Haha!). But there is definitely an intentional nod toward this spring idea of nests, eggs, and birds.
Let’s say you love lemons! You can tuck in subtle touches of yellow (consider some vintage brass for this!) and lemon-related items. Every, single décor piece doesn’t have to have lemons. After all, who really wants to have several storage bins full of lemon décor? But you could have one, small drawer of these items that you pull out and mix into your standard, every day décor.
")
Here are some things that are always in rotation in my décor:
- Ironstone (especially pitchers, compotes, and small plate stacks)
- Vintage bread boards
- Vintage dough bowls
- Architectural salvage base and cloche
- Architectural salvage corbels
- Wooden trays
- Large baskets
- Zinc (especially a pitcher or bucket)
- Vintage books
If you really study my décor, you’ll see the same items on repeat, over and over and over, and many of them, I’ve had for a lot of years! You can see a lot more details of our home over on my Instagram to get an idea of how I rotate these kinds of items through my décor
Get Started!
Chances are, you won’t love every vignette you create. You might try it several different ways before you find something that clicks.
But you’ll never get that refresh to your room if you don’t try!
Don’t wait for your dream house or home renovation to refresh your spaces. A little creativity, a little perseverance, and a little shopping (around your own home!) will go a long, long ways!
Just don’t forget the base to your vignette! It’s a little like life…you need a good foundation!
Blessings,
Robyn

Gallery
Love it all!
Thank you so much Robyn for these wonderful ideas and tips. I have difficulty with change and tend to leave my decor untouched for long periods of time. You’ve inspired me to change it up. I’m starting today! ????
Love all these ideas! Such inspiration! Thank you for sharing ????????????????
Thank you Robyn for the inspiration. I’m now looking around my house and thinking hmm what shall I do there?????
Thanks Robyn for all these great, simple tips! Since I’ve started following you I now have drawers designated just for my decor pieces ???? you’re the best! Thanks for the inspiration ❤️
THANK YOU for the great TIPS !!lll. linda of no.cal. @ le.gans
Great information/ideas for creating vingnettes, they can be tricky…When I try to fix them they look good, like you said, as long as I like them, same with our tablescapes. Really great ideas, thanjs????????????????????????????????????
Love this Robyn! Thanks for the tips and inspiration. Sharing on my weekly wrap-up blog post tomorrow.
Thank you so much, Kim! I really appreciate it!