Naked Cake with Fruit
Welcome to something new to the blog for 2021! My 12-almost-13-year-old is joining our Robyn’s French Nest team as our official baker! While I love how experimental cooking can be, I do not enjoy the precision and carefulness of baking. Payton, on the other hand, absolutely loves it! So, grab a cup of coffee and enjoy January’s edition of “Payton’s Pastries”! She put this together all on her own, including links that she thought you would enjoy! (Can you tell I’m super proud of her?!?!) We are glad you’re here! ~ Robyn
One of my favorite things to do in my spare time is working in the kitchen. Whether it’s cooking dinner for my family or baking a batch of cookies for a party, I love making it! One of the things that I especially enjoy in the kitchen is baking. I love it because I can share something that I created with the people I love. I can share the joy that baking brings me with those around me.
One thing that made my time in the kitchen so much easier was a cake decorating kit that I got for Christmas. It includes some must-have items for baking and decorating a beautiful cake. The first thing that came in this set was a turntable that you set the cake on to decorate it. It is especially useful to accomplish a smooth finish for your cake. Another thing included in this kit was a set of offset spatulas. I found that they were great for smoothing out icing and evenly distributing the frosting around your cake to ensure an even amount on each serving.
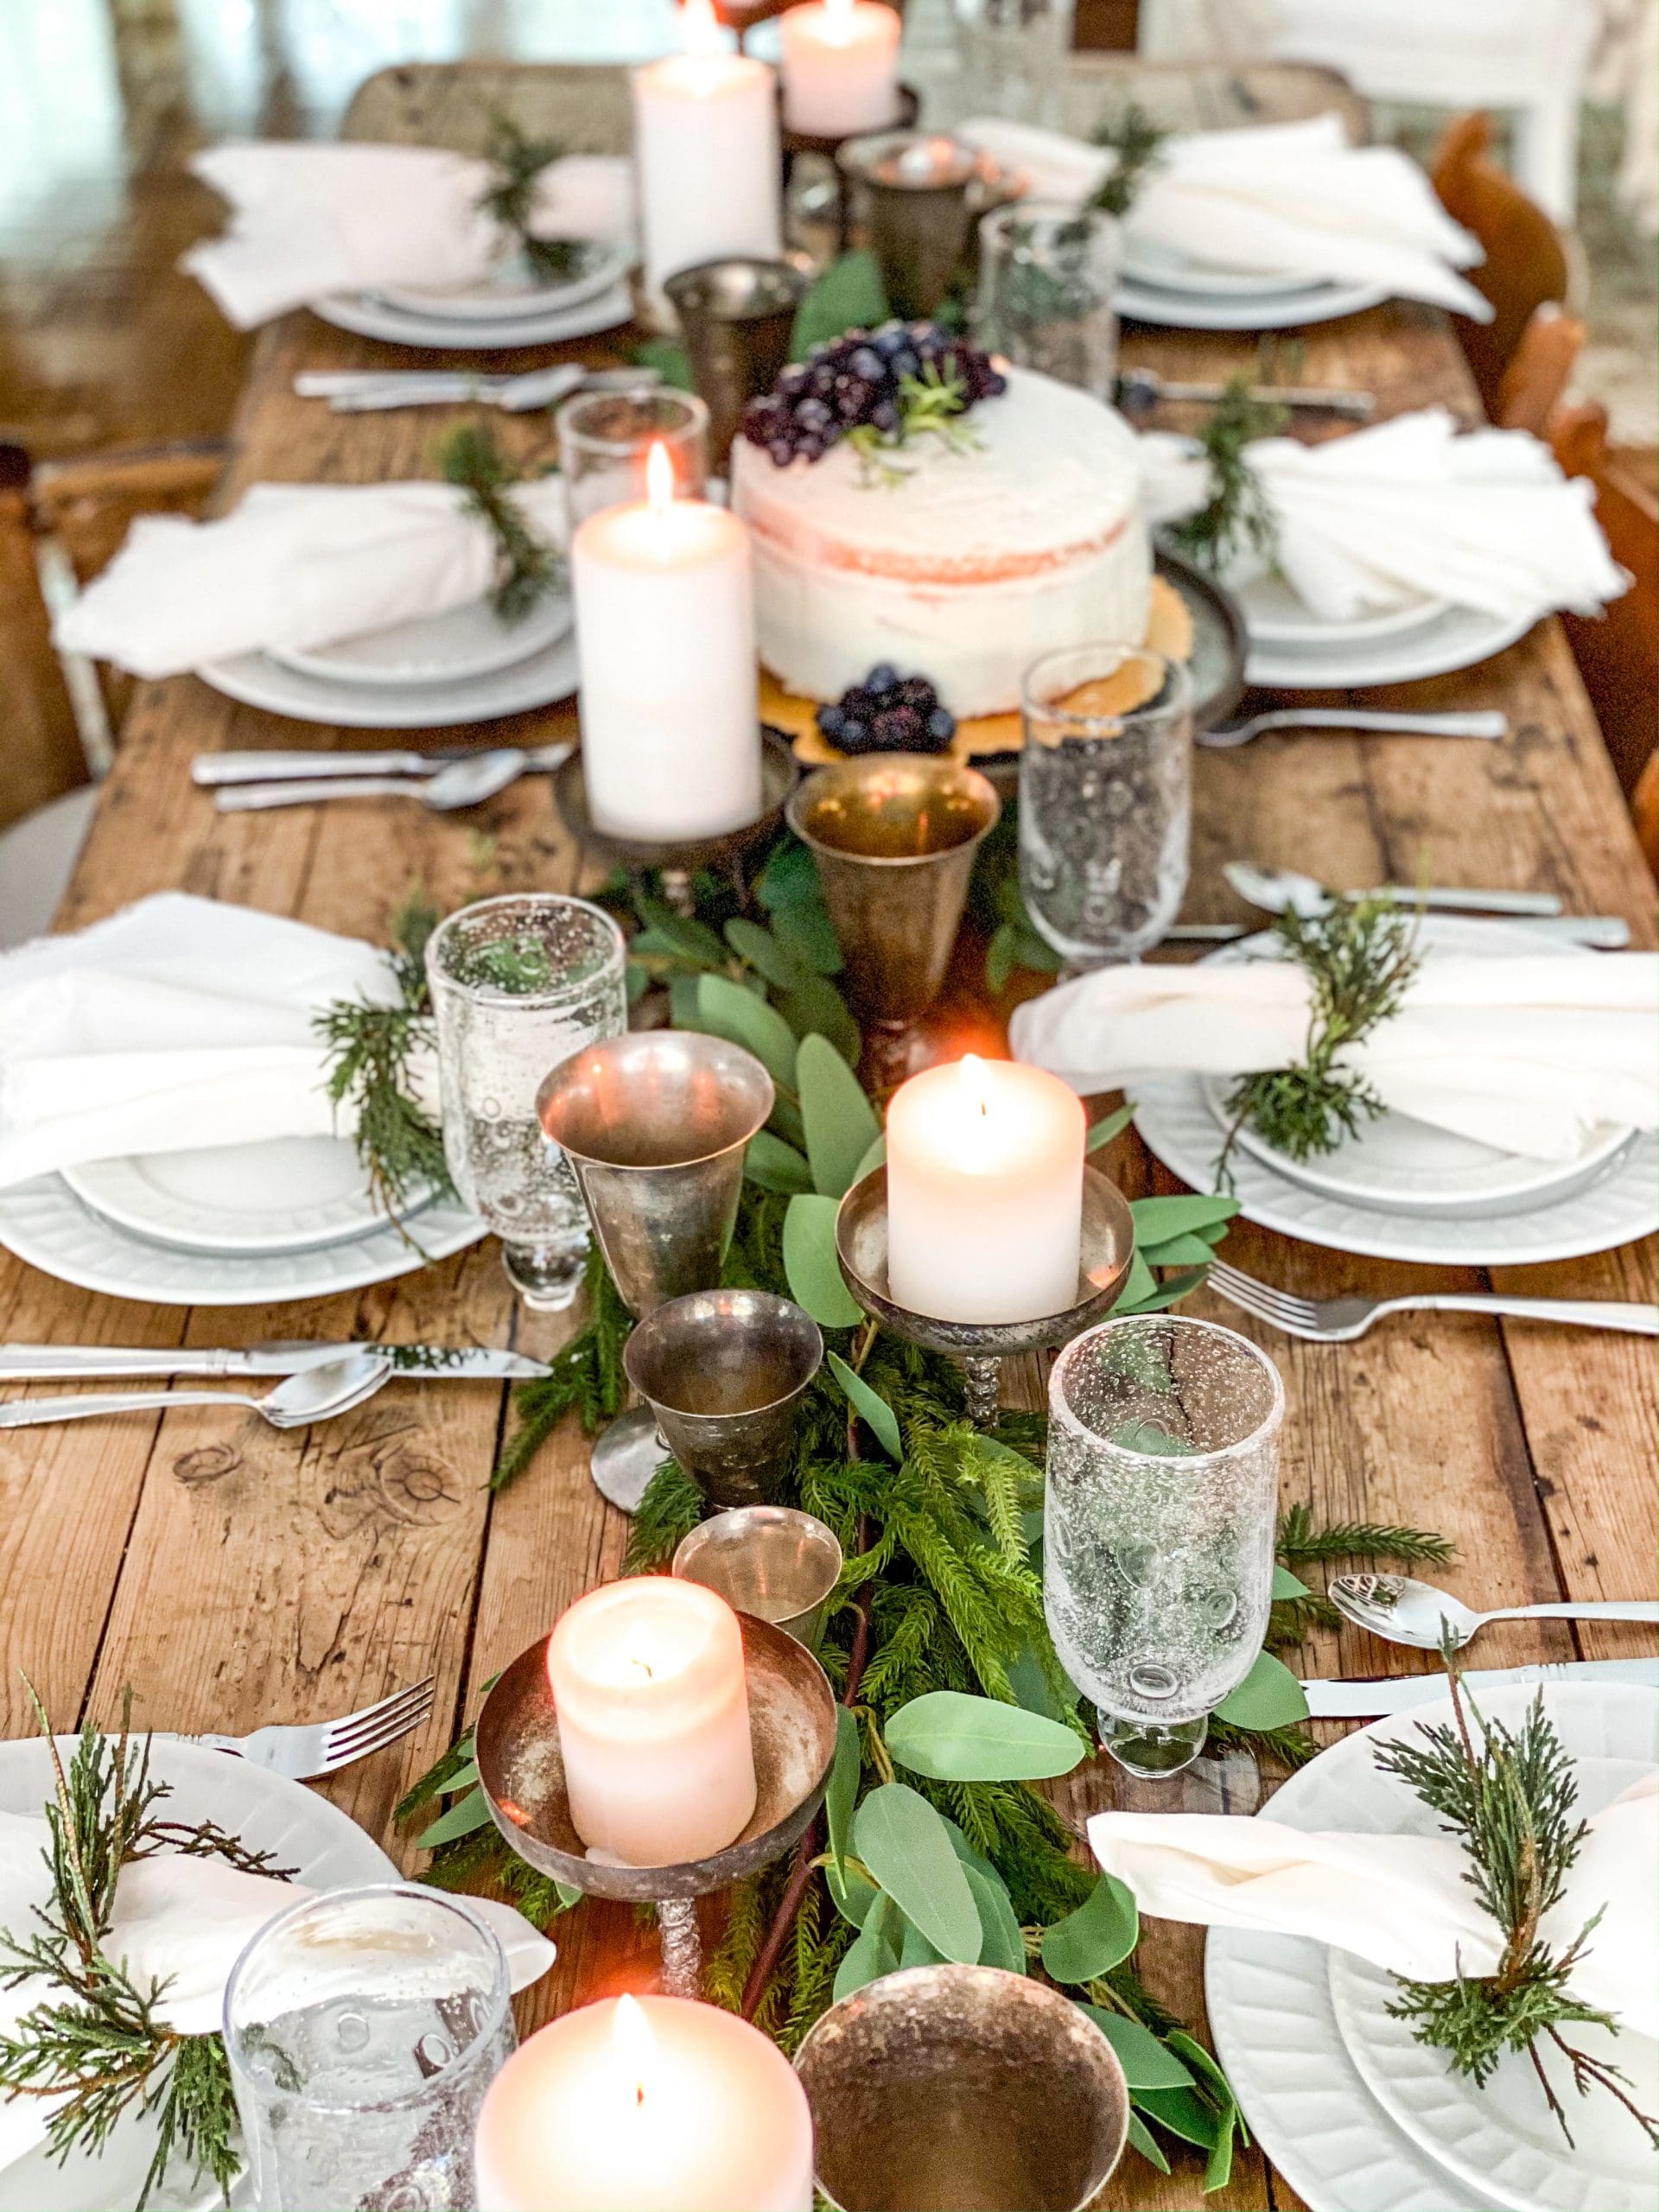
This recipe is fun to make and so simple to follow. It is called a naked cake because the icing is so thin in some areas that you can actually see the cake underneath. Everybody’s version of a naked cake isn’t exactly the same, so if you would like to have no icing covering your cake or lots of it, that is up to you! I love this recipe especially because of how the icing looks like more of a glaze than a thick layer of buttercream. The amount of buttercream on the cake is right in the middle of a completely frosted cake and one with no icing.
I got this recipe from Cake Decorating for Beginners by Rose Atwater. It was very helpful because it explained many techniques that helped me bake this cake. She includes a recipe for vanilla cake and an American buttercream, which I used for this recipe. She also includes a recipe for chocolate cake and a few other options for frostings. These recipes taste amazing and they are super easy to make.
")
Ingredients:
- Cake release spray
- 1 1\4 cups whole milk
- 1\2 cup heavy whipping cream
- 2 1\2 cups all-purpose flour
- 1 cup cake flour
- 2 teaspoons baking powder
- 1 cup (2 sticks) unsalted butter, room temp.
- 2 3\4 cups sugar
- 1 1\2 teaspoons salt
- 1 1\2 tablespoons vanilla extract
- 3 large eggs
")
Instructions:
- Preheat oven to 325 degrees. Prepare three 8-inch cake pans by coating the bottoms and sides with cake release spray.
- In a small bowl, mix together the milk and heavy cream. In a medium bowl, sift together the all-purpose and cake flours and baking powder. Set aside.
- (Tip: if you don’t have a sifter or strainer, you can mix and fluff your dry ingredients with a whisk to get the same aerated effect as sifting.)
- In a large bowl, cream the butter using an electric mixer (If you have a stand mixer, use the paddle attachment) on medium speed until it’s soft and light, about 2 minutes. Add the sugar and the salt and mix until the mixture is light in color and fluffy, about 2 minutes. Scrape down the sides of the bowl often. Add the vanilla and mix until just combined. Add the eggs, one at a time, mixing for 20 seconds after each egg, scraping down the sides of the bowl as needed.
- Turn the mixer speed to low. Then add one-third of the flour mixture, and mix until just combined. Add half of the milk mixture and mix until just combined. Then add another third of the flour mixture. Repeat with the remaining milk and flour mixture. Be careful not to overmix!
- Divide the batter between the prepared pans ( Approximately 3 cups of batter per pan) and spread it out evenly. Bake for 35 to 40 minutes, until a toothpick or a cake tester inserted into the center of each cake comes out clean.
- Let the cakes cool in the pans for 10 minutes, then turn out into cooling racks to cool completely.
Vanilla American Buttercream
Ingredients:
- 1 cup (2 sticks) unsalted butter, room temp.
- 1 cup vegetable shortening
- 1 1\2 teaspoons pure vanilla extract
- 1 1\2 teaspoons butter vanilla emulsion (optional)
- 3 to 4 tablespoons milk or water, divided
- 1\4 teaspoons salt
- 2 pounds (approximately 8 cups) powdered sugar
Instructions:
- In a large bowl, using an electric mixer on medium speed (if you have a stand mixer, use the paddle attachment), beat together butter, shortening, and extracts until smooth and creamy.
- Add 2 tablespoons of the milk or water, the salt, and half the powdered sugar and mix until just combined. Scrape down the sides of the bowl.
- On low speed, gradually add the remaining powdered sugar. Add more milk or water as needed to achieve the desired consistency. If using within 2 hours, the frosting can be left at room temperature. You’ll just need to keep the frosting covered with a damp cloth to prevent it from crusting. If not using in 2 hours, store the frosting in the refrigerator in an airtight container. When ready to use, bring the frosting to room temperature and rewhip it on low speed to soften before using.
How to Make Naked Cake
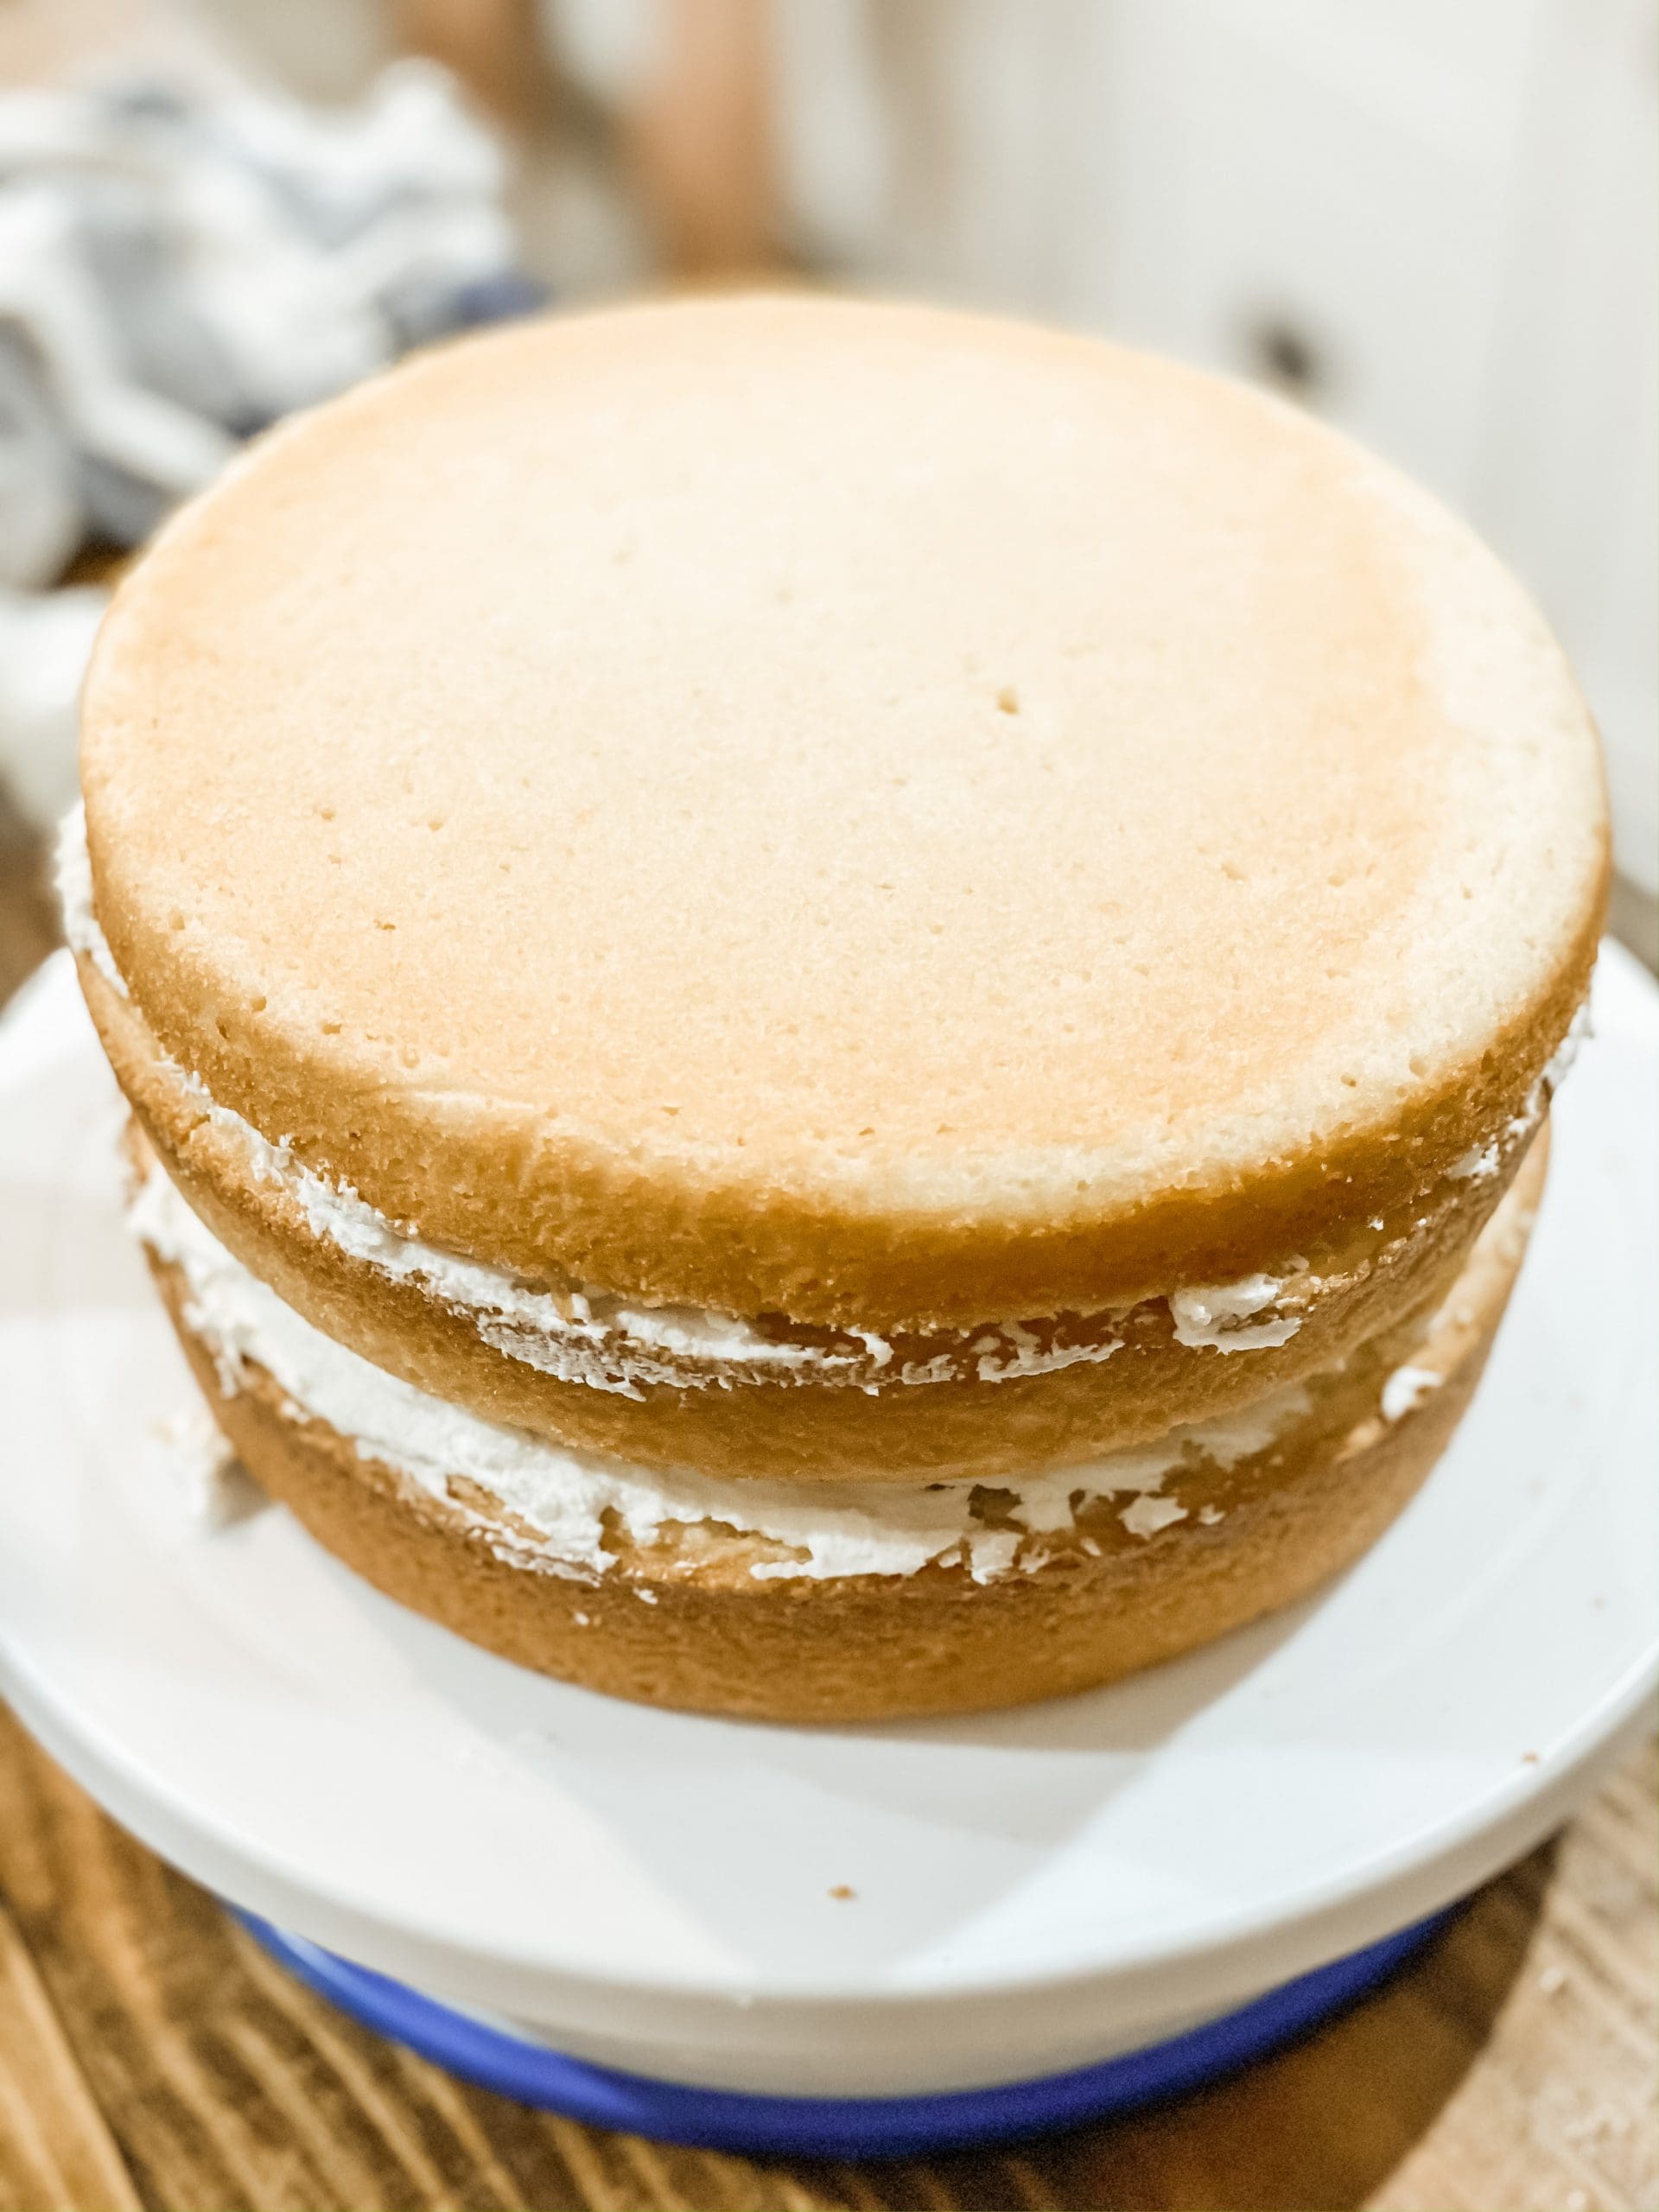
- Place your filled and chilled cake on a turntable (don’t forget the cake boards!).
- Cover the top with frosting, then push it over the edge to cover the side with a thin layer. Add more frosting as needed to cover the cake.
")
- Run a bench scraper around the outside of the cake, removing most of the excess frosting but leaving a thin layer you can see through in places.
- Use the spatula to scrape from the top edge toward the center and smooth away the lip of frosting. Rotate the cake until the top edge is sharp and clean.
")
- Glaze the fruit of your choice with warmed jelly or jam of that fruit mixed with water.
- (Tip: use a pastry brush or something similar to “paint” your fruit with the jelly/jam.)
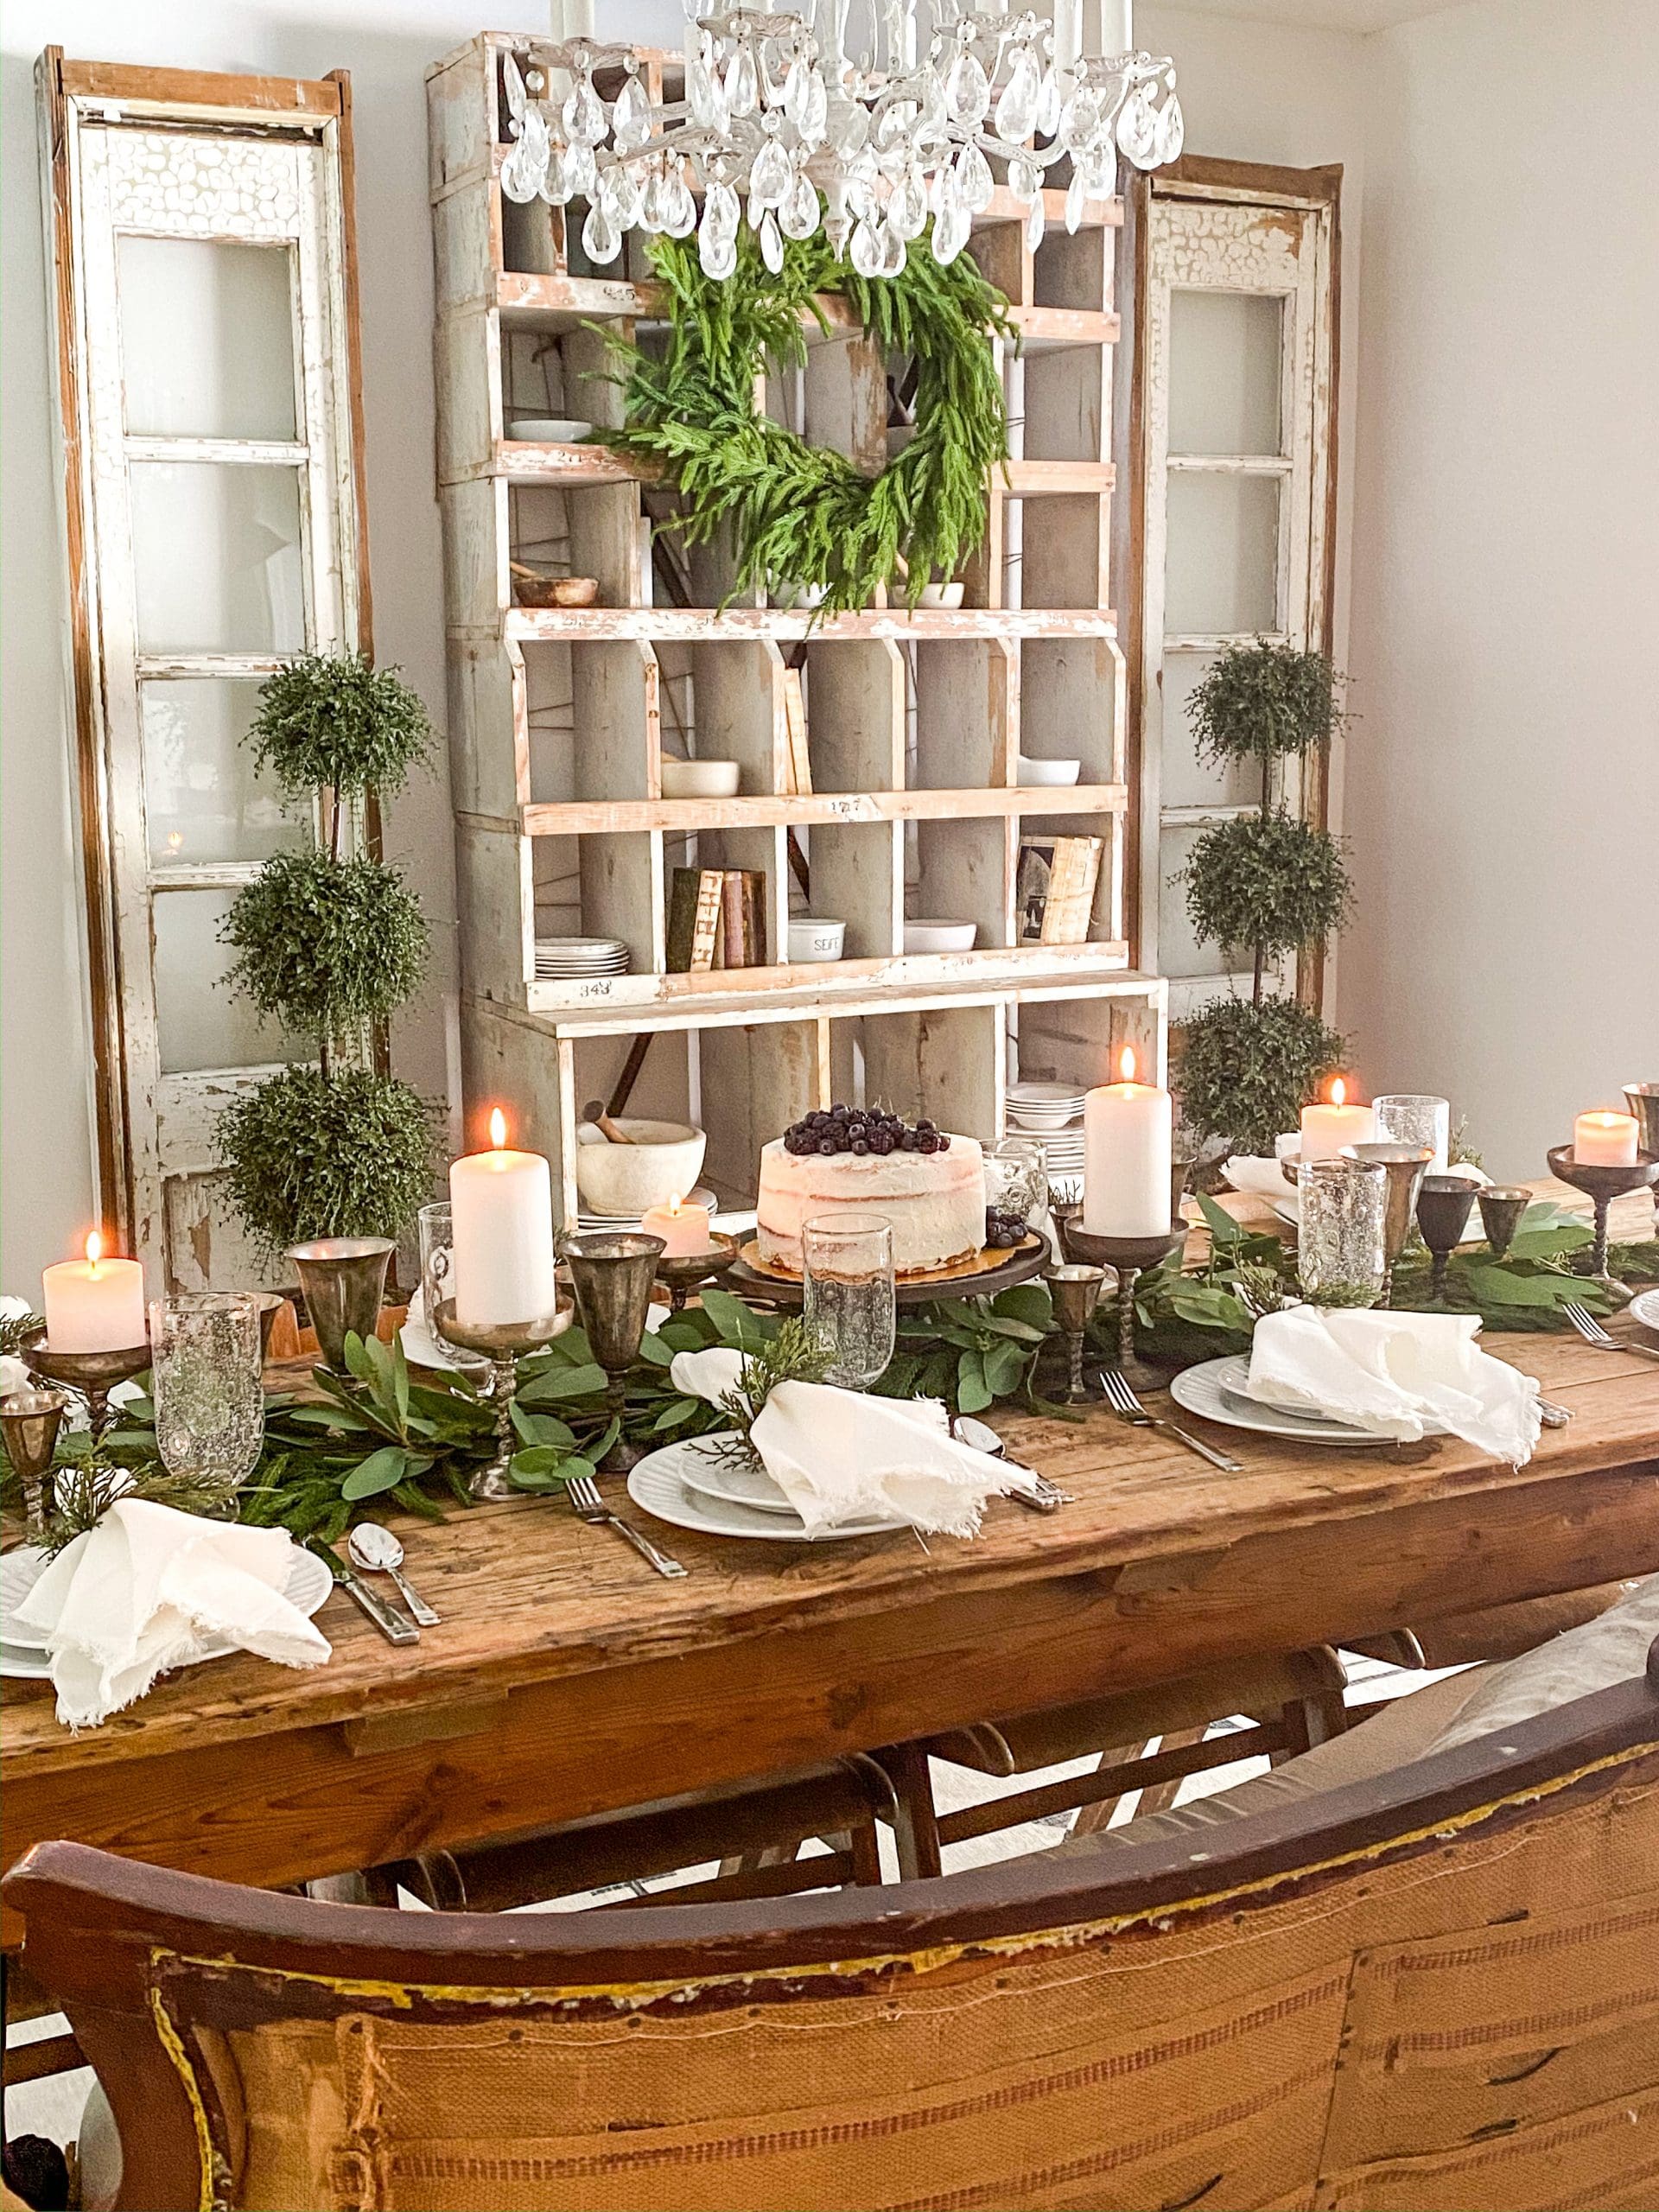
- Arrange the fruit on top and/or around the bottom of the cake.
")
I hope you enjoy baking this dessert as much as I did and that your taste-tasters enjoy it too! Happy baking!
Blessings,
Payton

Gallery
The cake is not only beautiful, but looks delicious. Love the simplicity of it. Definitely want to give it a try!! Great job writing and explaining on the blog. Keep it up!!
What a wonderful job you did Payton!!! This cake is absolutely BEAUTIFUL, with straightforward steps and looks manageable enough for an early weeknight baking session.
I think it’s great you love to bake for your family to express your love for them. That is exactly how I started out my career (when I was around 9) but I certainly didn’t possess your skills way back then. At 15, I trained with a chef at a very busy family restaurant and banquet hall, eventually becoming his assistant chef. One of my biggest errors in life is that I would have loved to receive formal baking training. But over the years I’ve educated myself by reading the very best baking cookbooks, blogs and watching skilled artisans do their work. I work privately as a chef now (for 32+ years) and would not change one thing of all the experiences I’ve had over the years!
Even though this may not be your eventual career choice, I’m sure your love of baking will continue throughout your life and those around you will be blessed by your love and efforts ????
CONGRATULATIONS on your first blog post — it was a delight to read and see the gorgeously styled photos!!!
You’ve inspired me to bake something this weekend ????
Beautiful! Welcome, Payton! Looking forward to more creations!
Beautiful ???? and
Amazing ????????????
Congratulations!
Well Robyn watch out because I can see Payton getting tons of great followers and having her own blog! This looks so yummy! She did an excellent job and the post is so well written! WOW!! What a sweet heart and a true blessing!
Can’t wait to see your next creation Payton!
I am blown away! The post is beautifully written, clear and concise! The cake looks amazing!!! Looks very professional. Well done Payton! I see a blog in your future!❤️
Well you have done a fantastic job‼️ I am going to bake this cake for my husband this coming Saturday. It will be our 50th anniversary. Because of COVID we can’t have a celebration with our children and grandkids. I will make a nice dinner and have your cake. Blessings, Tudy
Good for you Payton! Who helped you get started baking if your mom doesn’t like to bake. I also started baking very early. I had 3 much older brothers and they would give me a quarter if I would bake them a batch of cookies ???? but my mom showed me how to bake
Wow Payton!! You made a stunning cake. I bet it taste as good as it looks. I can’t wait to try this recipe!
Cake looks amazing. Can’t wait to try this recipe. So many great techniques you shared. Great job Payton!
The recipe and the cake look yummy, can’t wait to try it! Thanks for the links, that was helpful and the cake decorating set looks very resourceful for me. I want to try a little bit of cake decorating to see if it’s something I’m going to have the patience for without spending a lot.
So helpful, Payton!! And you did such a beautiful job!
Wow beautiful!
I love that your daughter made the cake ❤️
Oh Payton!
Your cake looks amazing! How pretty it looks on the table! Your presentation is right on point! Wow you are your mothers daughter! Minus the baking that is. Haha
Great job Payton!! This cake looks amazing! Thank you for the beautifully detailed instructions! I’m not much of a baker, but you have truly inspired me!
Great job! Beautifully demonstrated, well planned out! First try st this and you are a natural! Keep going!
Payton, wonderful job! Your cake looks amazing and I am sure it tastes terrific. I look forward to more of your posts.
Your mom should be impressed with you you’ve done a phenomenal job it looks incredibly delicious and I wish I were there that I could have a piece with a cup of tea. Keep going you’re doing a great job and you obviously have a great teacher
You are an amazing young lady, Payton! You make this look so easy and I’m sure it is yummy! I couldn’t be more proud of you and your Great Grandma would be so very proud of you. She loved to bake and especially enjoyed decorating cakes! Love you, Nana!
Payton,
This cake looks so amazing. You are very talented, and I do hope you will continue to bake and share your recipes with us.
The very best to you,
Sondra
Beautiful cake and I’m sure it tastes amazing. Beautifully written post too.
Thank you Payton for sharing your blessed talent. ????
Looks beautiful and I bet taste great.!
Very Impressive Payton! I can’t wait to try this recipe. Thank you for sharing.
Awesome job Payton! You’re a natural! Thank you for sharing your talents with us ????
That is a BEAUTIFUL cake!! Wow!!! Makes my mouth water just looking at it!! Great job Payton!!! Also loved the blog!!!
Beautiful! You did a great job… That is my favorite cake! I’m looking forward to each installment of Payton’s Pastries!
This is such a beautiful cake!!!
Absolutely Stunning Payton! Great job Mom!.
Beautiful cake!!
What a great job! Love Payton’s easy to understand directions!! So beautiful!
Great job Payton! I also love to bake for my family. It is my way to relax. This cake recipe looks amazing and I plan on trying it out soon. Well done!
Payton, this cake is so beautiful and you are an amazing writer! Thanks for sharing!!!!
WHEN are we going to see another cake from Peyton? Can’t wait to see what she comes up with!