A Valentine’s Day Cake for Mom
Welcome to another installment of “Payton’s Pastries”. She found the shortcut to my heart by making me a beautiful cake for this Valentine’s Day. I hope you enjoy reading about it as much as she enjoyed making it!
~Robyn
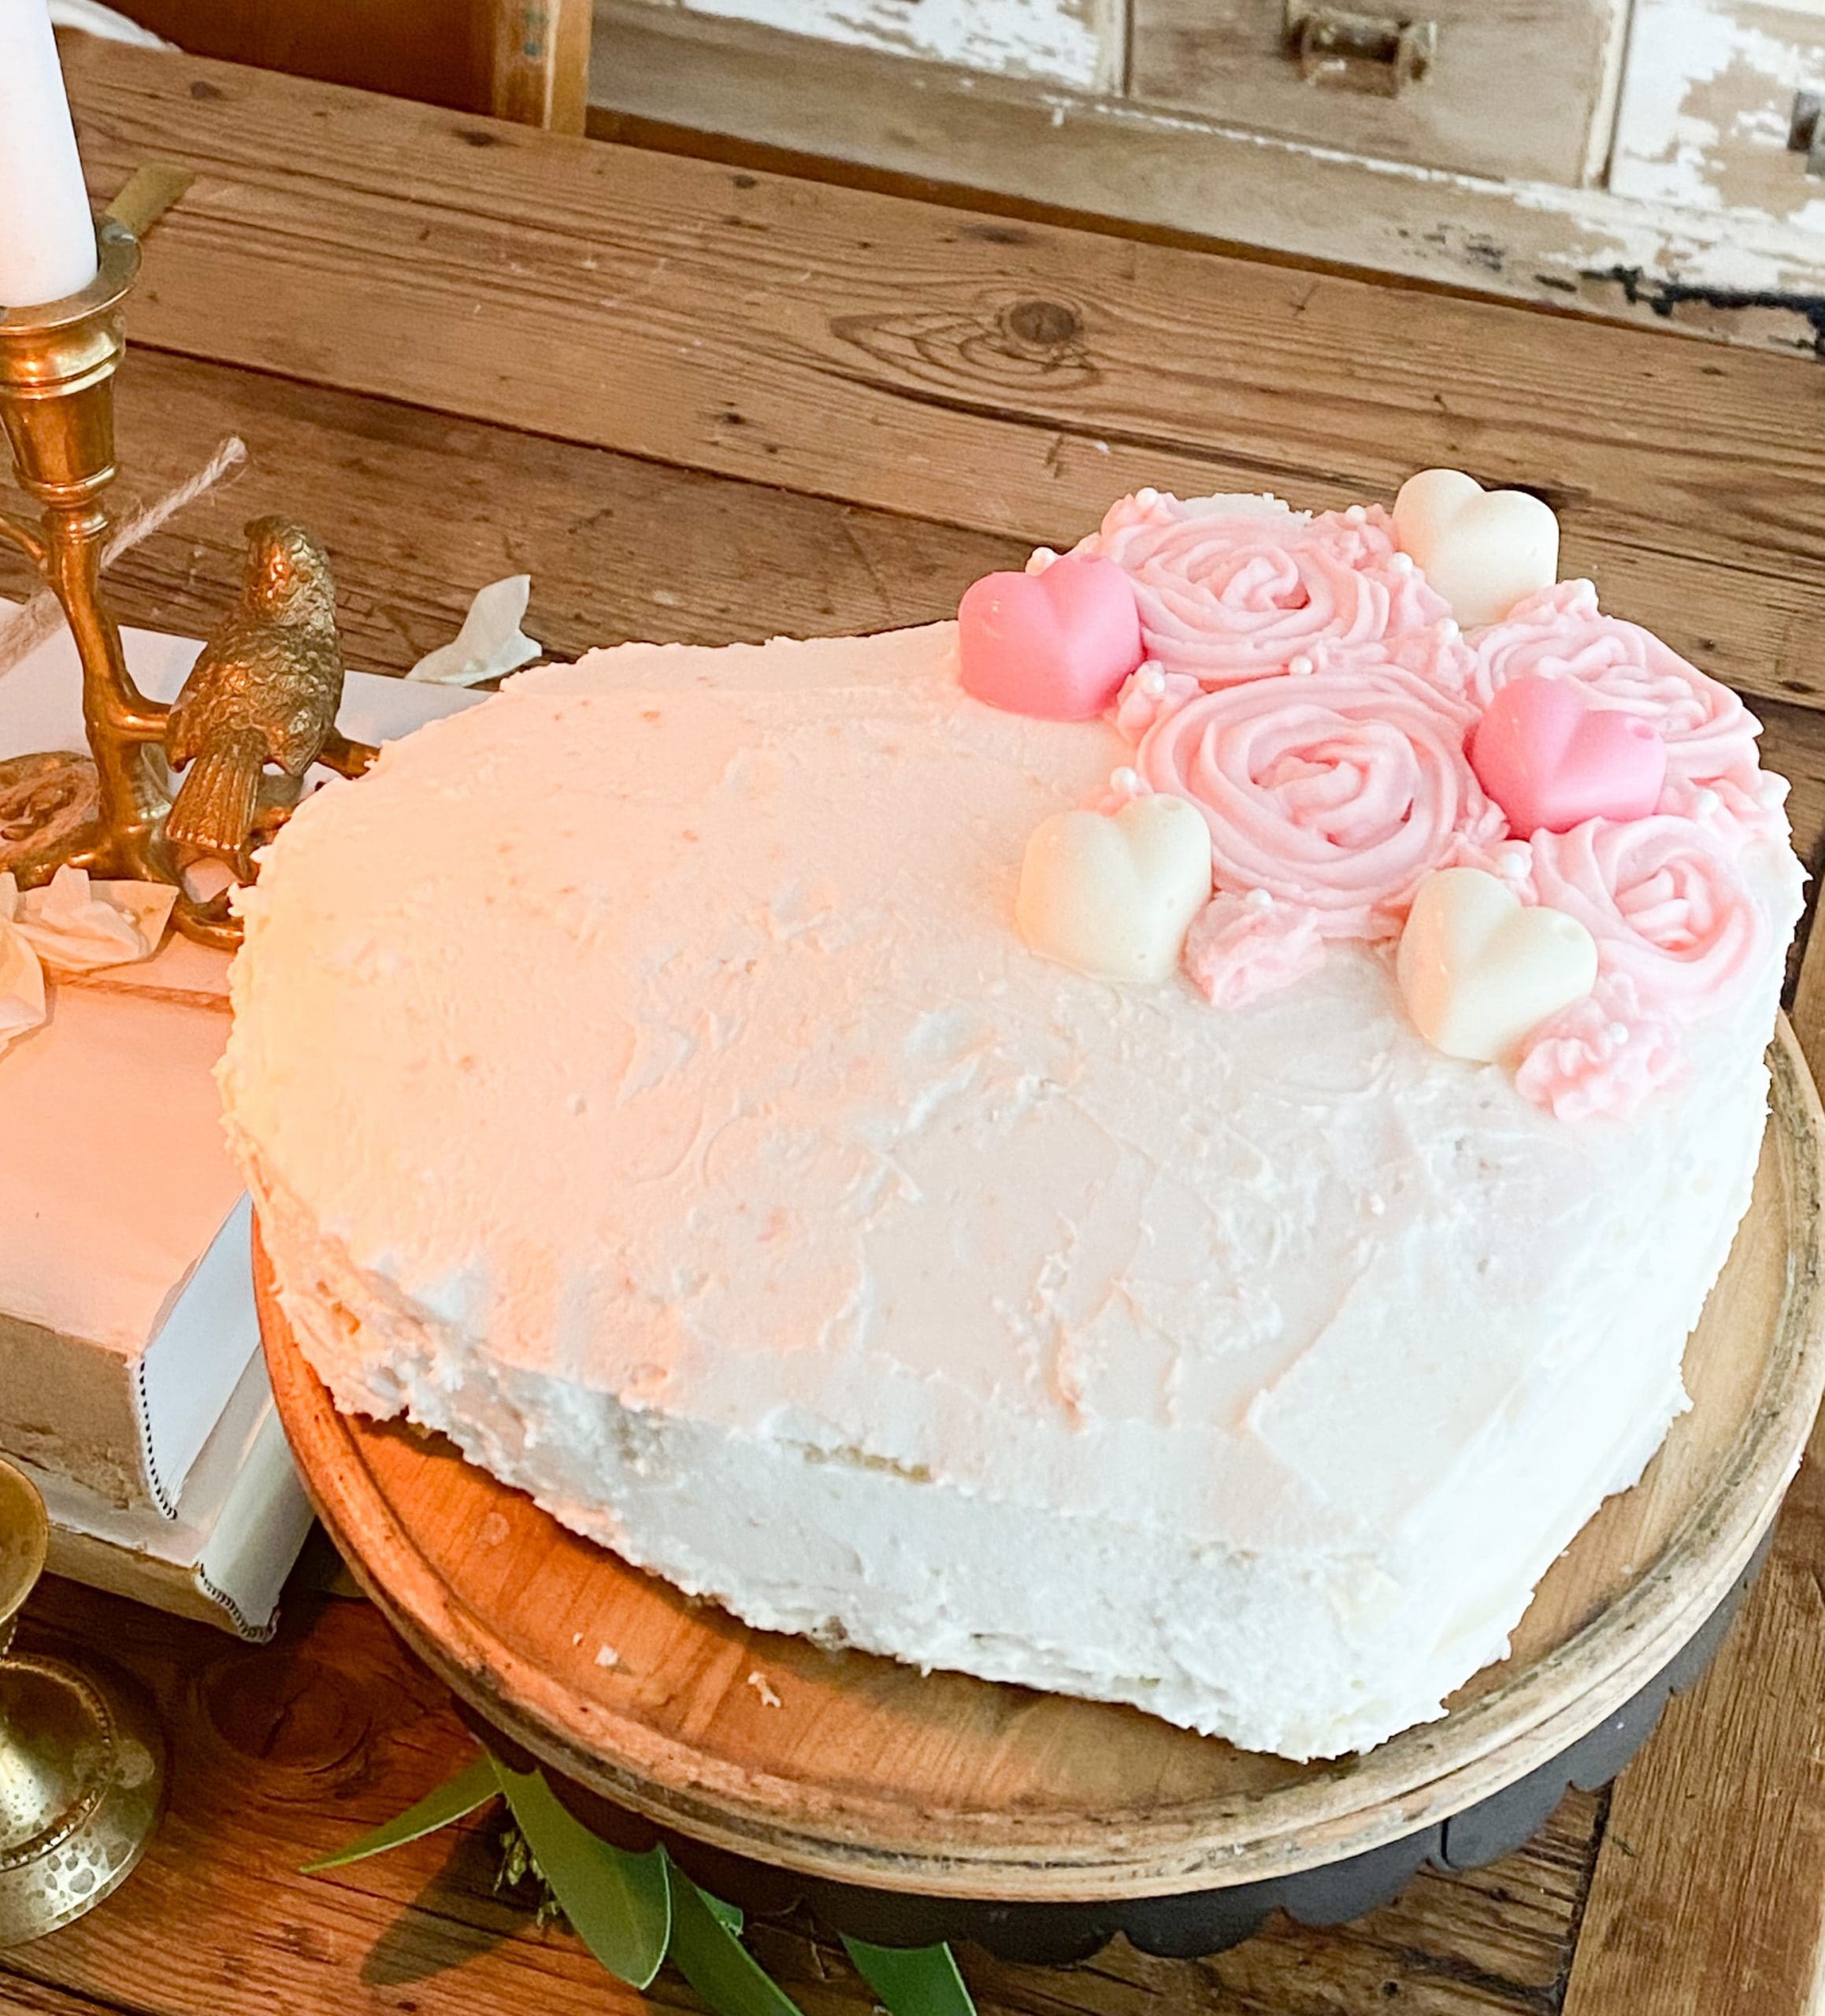
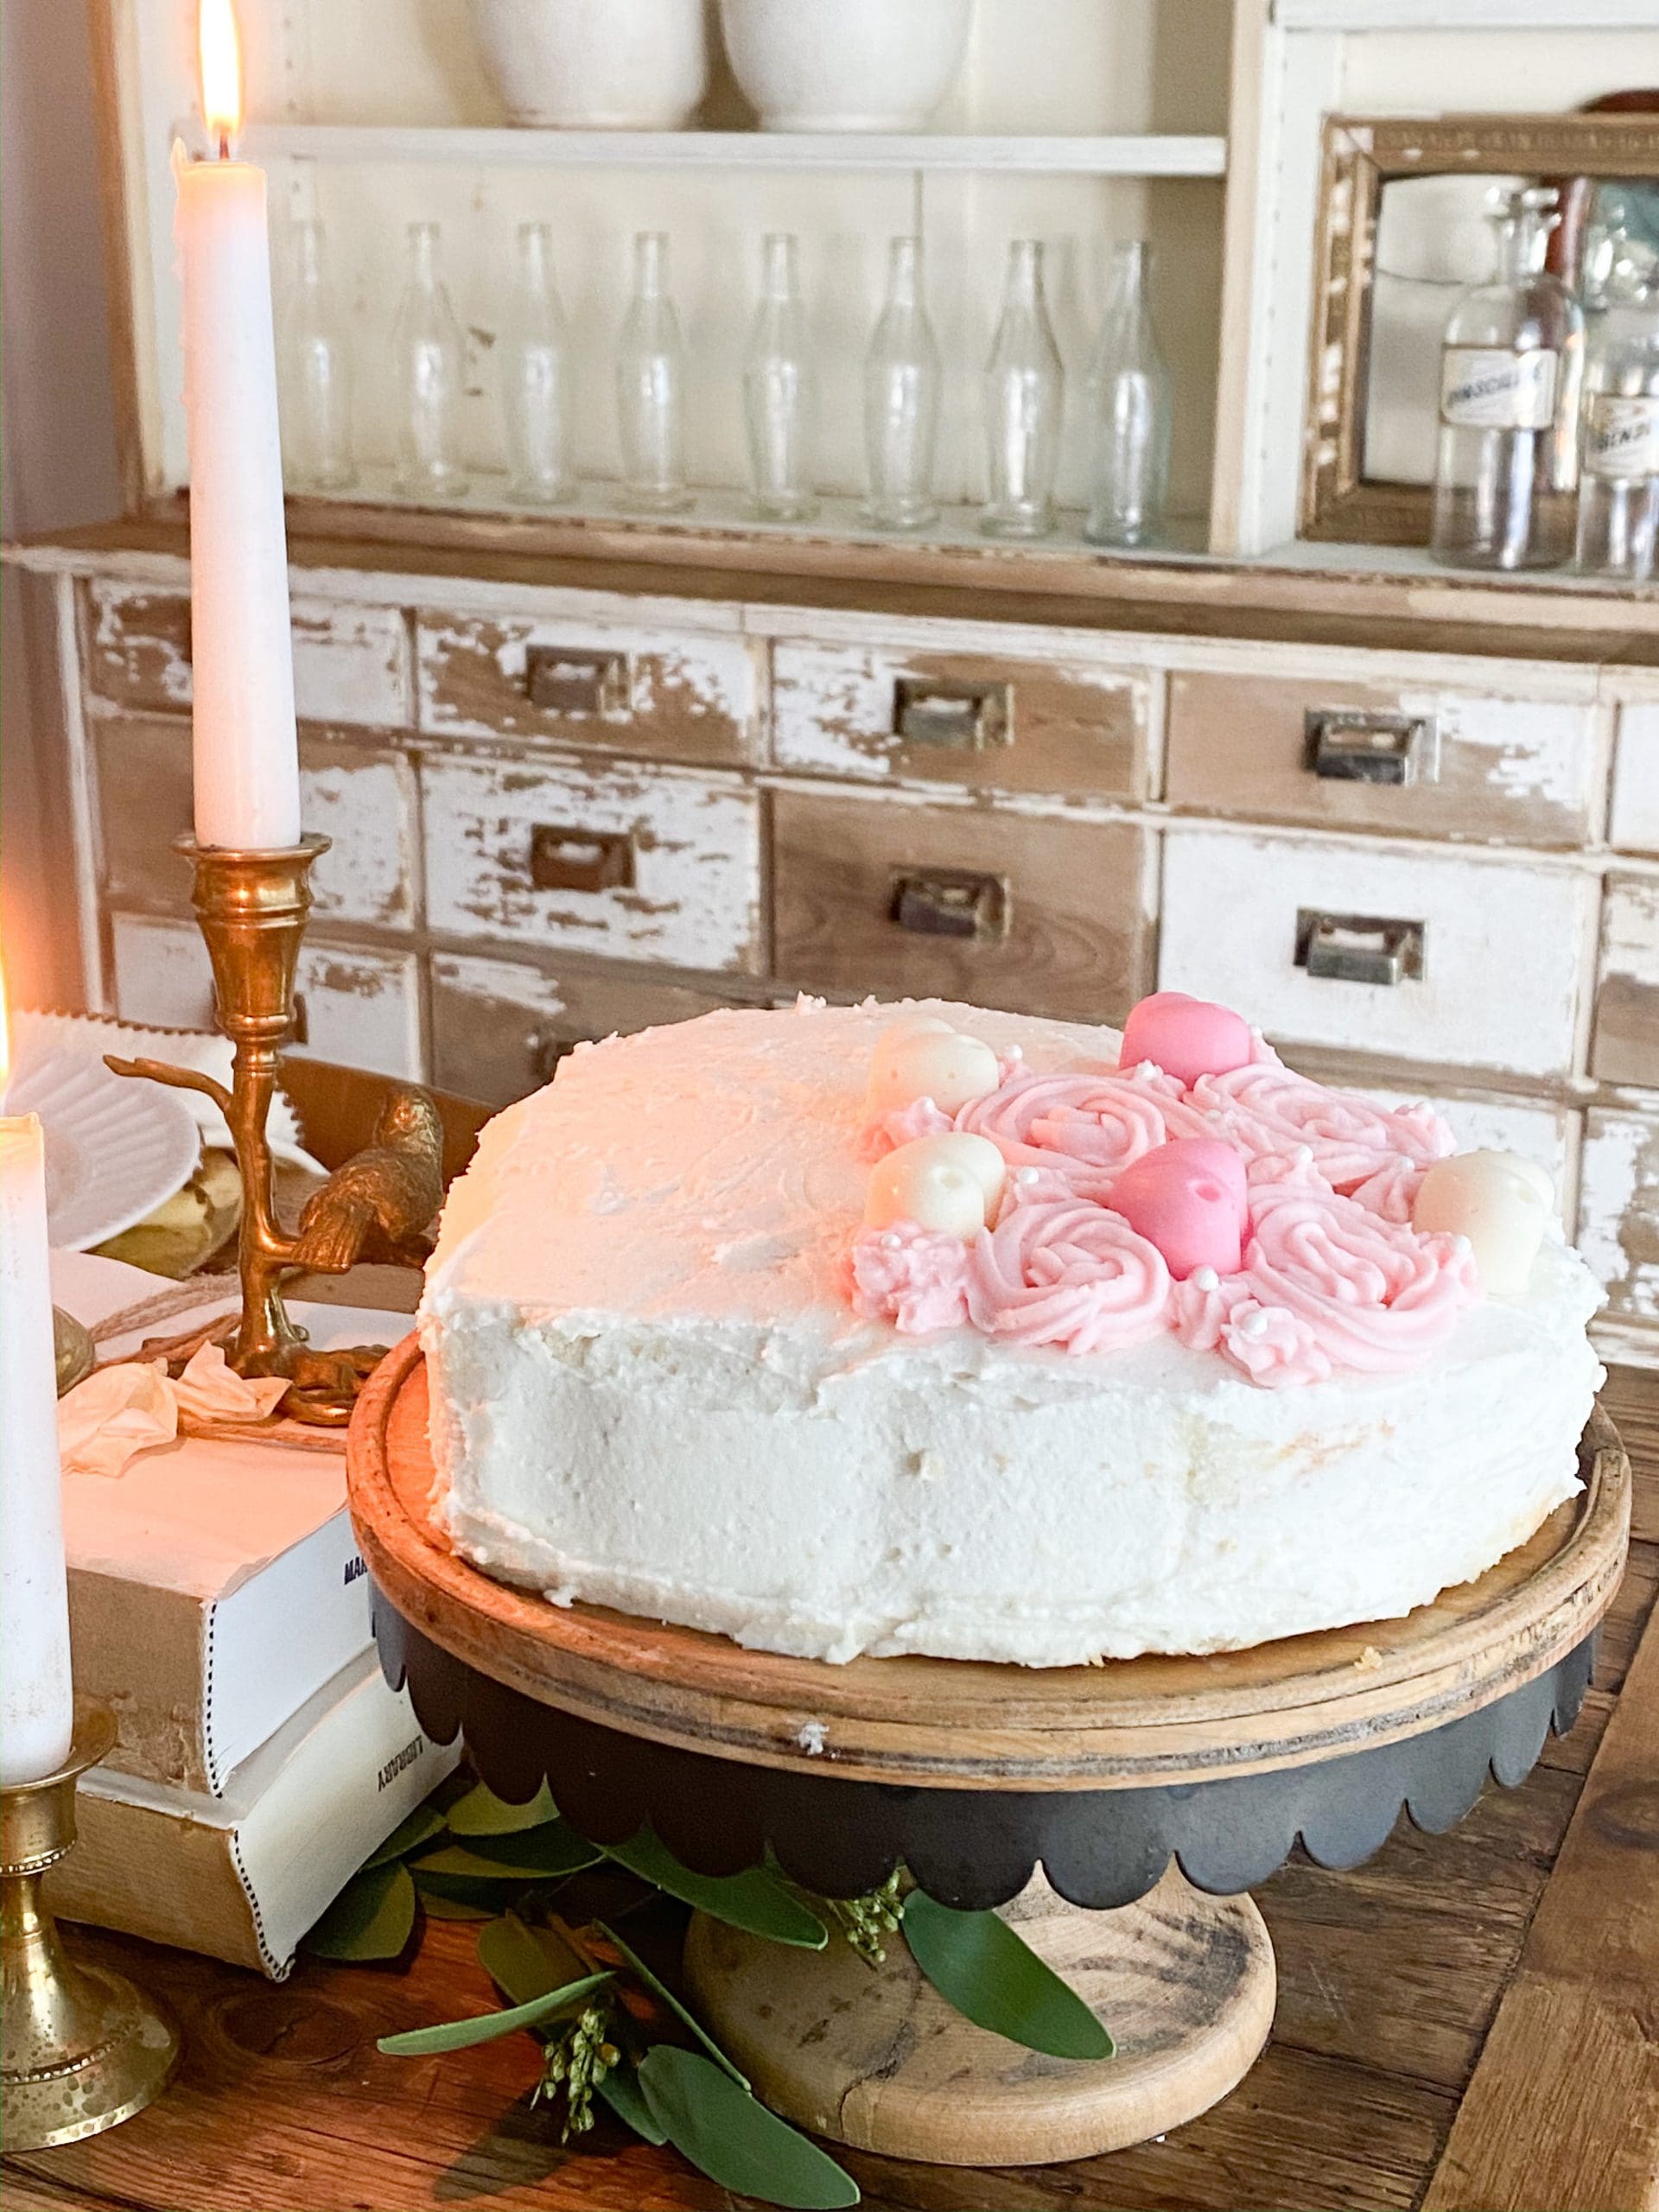
For the month of February, I wanted to make a Valentine’s dessert that had the traditional hearts, roses, pinks and reds. While including those festive themes, I also wanted to build those elements off of something white because white is, of course, my mom’s favorite color. And since I love her so much, I made the main color of my cake white and used the other elements of Valentine’s Day to accent the white. I really enjoyed making this dessert, and I felt like it was fairly simple as well.
")
This heart-shaped Valentine’s Day cake is just a two or three-layered cake with American buttercream and the cake flavor of your choice. I went simple and chose vanilla for my cake, but you could go with a chocolate cake or a red velvet flavor to bring in some more Valentine’s Day feel to your cake.
If you don’t have a heart-shaped pan, guess what? You don’t need one! I only had a round pan, and I didn’t want to go buy a new cake pan for a cake I might make MAYBE once a year. So I decided to carve out my cake from a regular circle pan. You want to make sure that you have your layers of cake stacked and filled with buttercream or whatever your filling is BEFORE you carve your cake. Otherwise, your cake layers might be uneven, making it difficult to have a smooth finish on the outside. It also makes it harder to fill your cake.
")
This cake is really a lot simpler than it looks at the end. If you do it right, you should be able to end up with a pretty straight heart-shaped cake with beautiful rosettes on the top of your heart. I am going to put the recipe that I used for my vanilla cake and my favorite buttercream recipe below. I got this recipe and these instructions from Rose Atwater. She wrote an amazing book titled Cake Decorating for Beginners. I used this book for many techniques such as piping the rosettes and how to smooth down the edges of the cake.
Vanilla Cake
Ingredients:
- Cake release spray
- 1 1/4 cups whole milk
- 1/2 cup heavy whipping cream
- 2 1/2 cups all-purpose flour
- 1 cup cake flour
- 2 teaspoons baking powder
- 1 cup (2 sticks) unsalted butter, room temp.
- 2 3/4 cups sugar
- 1 1/2 teaspoons salt
- 1 1/2 tablespoons vanilla extract
- 3 large eggs
Instructions
- Preheat oven to 325 degrees. Prepare three 8-inch cake pans by coating the bottoms and sides with cake release spray.
- In a small bowl, mix together the milk and heavy cream. In a medium bowl, sift together the all-purpose and cake flours and baking powder. Set aside.
- (Tip: if you don’t have a sifter or strainer, you can mix and fluff your dry ingredients with a whisk to get the same aerated effect as sifting.)
- In a large bowl, cream the butter using an electric mixer (If you have a stand mixer, use the paddle attachment) on medium speed until it’s soft and light, about 2 minutes. Add the sugar and the salt and mix until the mixture is light in color and fluffy, about 2 minutes. Scrape down the sides of the bowl often. Add the vanilla and mix until just combined. Add the eggs, one at a time, mixing for 20 seconds after each egg, scraping down the sides of the bowl as needed.
- Turn the mixer speed to low. Then add one-third of the flour mixture, and mix until just combined. Add half of the milk mixture and mix until just combined. Then add another third of the flour mixture. Repeat with the remaining milk and flour mixture. Be careful not to overmix!
- Divide the batter between the prepared pans ( Approximately 3 cups of batter per pan) and spread it out evenly. Bake for 35 to 40 minutes, until a toothpick or a cake tester inserted into the center of each cake comes out clean.
- Let the cakes cool in the pans for 10 minutes, then turn out into cooling racks to cool completely.
")
Vanilla American Buttercream
Ingredients
- 1 cup (2 sticks) unsalted butter, room temp.
- 1 cup vegetable shortening
- 1 1/2 teaspoons pure vanilla extract
- 1 1/2 teaspoons butter vanilla emulsion (optional)
- 3 to 4 tablespoons milk or water, divided
- 1/4 teaspoons salt
- 2 pounds (approximately 8 cups) powdered sugar
Instructions
- In a large bowl, using an electric mixer on medium speed (if you have a stand mixer, use the paddle attachment), beat together butter, shortening, and extracts until smooth and creamy.
- Add 2 tablespoons of the milk or water, the salt, and half the powdered sugar and mix until just combined. Scrape down the sides of the bowl.
- On low speed, gradually add the remaining powdered sugar. Add more milk or water as needed to achieve the desired consistency. If using within 2 hours, the frosting can be left at room temperature. You’ll just need to keep the frosting covered with a damp cloth to prevent it from crusting. If not using in 2 hours, store the frosting in the refrigerator in an airtight container. When ready to use, bring the frosting to room temperature and rewhip it on low speed to soften before using.
How to Make Valentine’s Day Cake
- After you have your filled, cut, and chilled cake, put a thin coat of buttercream to catch any crumbs that may fall. Then put your icing over the crumb cake to get a smooth finish
")
- To make the rosettes, you will need tip #17. After you fill your piping bag, squeeze the bag with medium pressure, holding the bag at a 90 degree angle. Start circling around that point until you reach the desired size.
- Tip: To make your flowers more swirly, rotate the bag as you are making your rosette. This should give you a more flower-like look.
")
- Melt the desired colors of candy melts in your microwave, checking and stirring every 30 seconds until smooth. Put it in a silicone heart mold (you can find them online or in your local craft store in the baking section). Smooth off the top of the mold so the bottom of the hearts are smooth and place in the refrigerator until hard
")
")
- When the hearts have hardened, place them in between your flowers wherever you want. Then, using the same tip as you did for the rosettes, pipe a dot with medium pressure to make a small little shape usually called a star. Place little sugar pearls in the middle of the stars.
")
")
I hope you have a lot of fun making this beautiful Valentine’s Day cake. Hopefully your taste testers love you and your baking a lot more after they see and taste this cake!
Good luck and happy baking!
Blessings,
Payton
")
Gallery

Payton, you are amazing and so gifted! I love you bunches!
Thank you! Love you too! ❤️
Hi Payton!
What a nice job you did on the heart shaped cake….the message and inspiration behind the cake is very loving and thoughtful….I know your mother’s heart is filled with love and joy…..
Keep up the nice work on your stories …I always like your photo’s at the end…very helpful content……
Take care and happy cake decorating!
❤️????
P, Great job. Your cake is stunning and so romantic looking.
Thank you!
Love this elegant cake. You did an excellent job. Can’t wait to see what you bake next????
Well done Payton! It turned out beautiful.
Thank you! It was a lot of fun!
Beautiful!???? You did a wonderful job..way to go!!!❤️❤️❤️
Thank you! I appreciate it!
Amazing job! Such great skills to learn at a young age
Thank you! Your encouragement means a lot!
Great job Payton! The cake is beautiful!
Thank you!
What a pretty cake!! When i first saw it, i thought it was a faux cake just used for decoration!!! Well done Payton!
Thank you for those kind words! I appreciate it!
Beautiful gift… from the heart for your Dear Mother.
Recipe sounds so delicious, and your decorating looks lovely.
Love your Post,
Thank you, Susan
Oh Payton! Your cake is as beautiful as your heart! What an absolutely wonderful gift to your sweet Mom! It is amazing! Happy Valentine’s Day honey. ❤️
Thank you! Happy Valentines Day!
She’s amazing! The cake looks beautiful and I bet it was delicious ! ????
You’re so sweet! Thank you!
So resourceful! It’s a beautiful cake! And my favorite… White cake, vanilla buttercream! Yum! Now I need cake! ☺️
Thanks!
Beautiful job Payton!
Thank you!
Payton, that cake looks beautiful and delicious! Thank you so much for sharing about how best to fill the cake first, before creating the heart! That’s brilliant!
Thank you! Yes, I found that to be very helpful making it myself!
Wow! I’m amazed at your talent Payton. Your cake is beautiful!
You’re so sweet! Thank you!
Looks delicious and so pretty! Thanks for sharing ☺️
Thank you! I enjoyed making it!
Peyton, you are amazing! Keep sharing your gift of writing and baking. I enjoyed your post tremendously.
You are so sweet! I’ll be sure to keep posting!
This cake is beautiful!! Nice job!! I’m not a baker and this makes me want to bake and decorate a cake!! ????
Thank you! I appreciate your kind words!
Payton,
The cake you made looks delicious. The decorations on the top make the cake so festive. Good tip on how to shape the cake into a heart, I am looking forward to your next baking project.
Oh, thank you! I appreciate it!
So impressive and talented for a nice young woman. Kudos to you looks delicious wish I was close by I would ask for a piece enjoy your talent
Thank you! I will!
Peyton your cake is soooo pretty. And it sounds delicious! What a good job you did. I love how you take us through your process. Very detailed and complete. Pictures help too! Keep up the good work!
Thank you!
Payton, your cake is beautiful and the directions are easy to follow. Keep up the good work!❤️????????????
You’re so sweet! Thank you!
Wow, Payton! What a beautiful gift you have! That cake looks delicious and oh, so lovely! Thank you for sharing!☺️
Thank you! That means a lot!
You did it beautifully Payton ????????It looks delicious too ! Happy valentines
To you and your beautiful family
Thank you! Happy Valentine’s Day to you, too!