Thanksgiving Feast Cheese Roll
But I am so glad that I get special time set aside to be in the kitchen. As you know, Thanksgiving is all about the food (and being thankful- but most of all, the food), so we are getting busy in the kitchen prepping for the holidays.
The answer is this recipe: My great-grandma’s cheese roll.

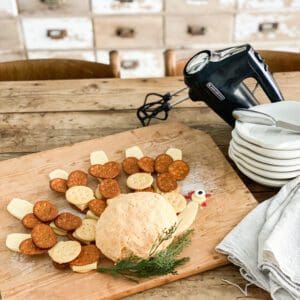
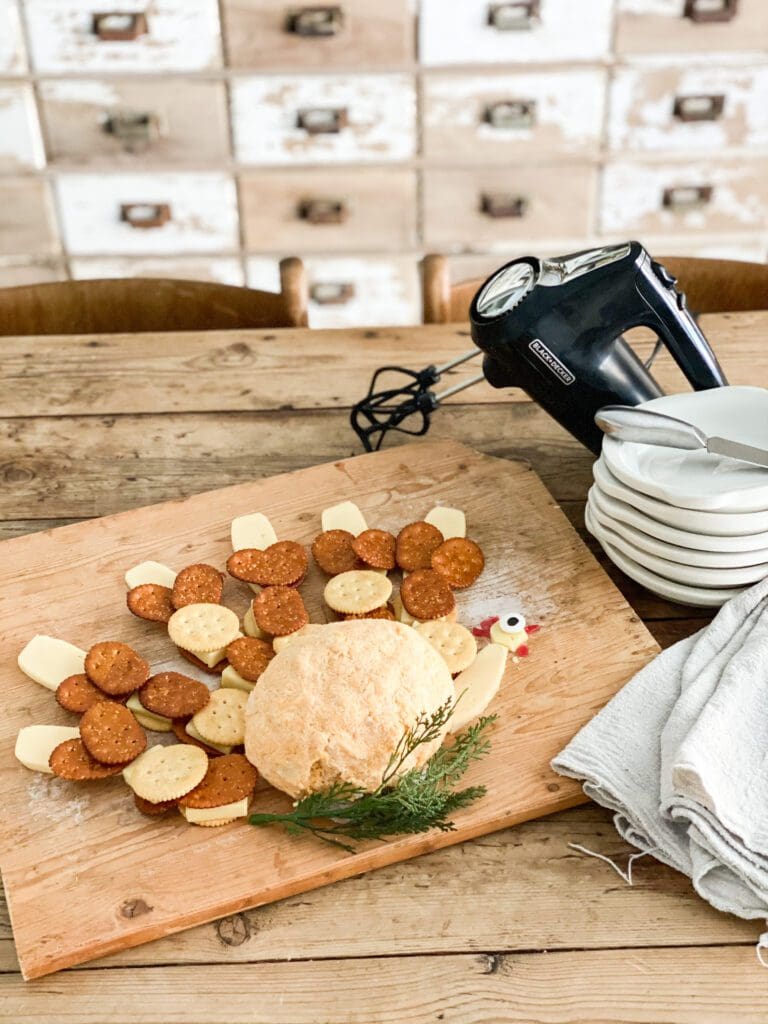
Because I am not only a Huff, I am my overachieving mother’s daughter, I made the cheese and crackers into turkey feathers and made the cutest turkey charcuterie board ever! I could not have been happier with the results, and it all tastes so good together!
Anyways, as I have mentioned before, this is my great-grandma’s recipe. From the stories I have heard, she never made anything bad, so I knew I could rely on this recipe to be scrumptious.
I thought it is so cool that this recipe has been passed down from generation to generation, and I think you guys will like it. I also like this recipe idea because everyone likes things a little different, and you could easily tweak it to fit your family’s preferences.
I was super happy with the results and will probably make this in the future!

Great-Grandma Hazelwood's Cheeseball Recipe
Ingredients
- 1 lb Shredded sharp cheddar cheese
- 8 oz Philadelphia cream cheese
- 1 Small onion, finely chopped
- Salt & Pepper to taste
- Chopped pecans or another nut (Optional)
Instructions
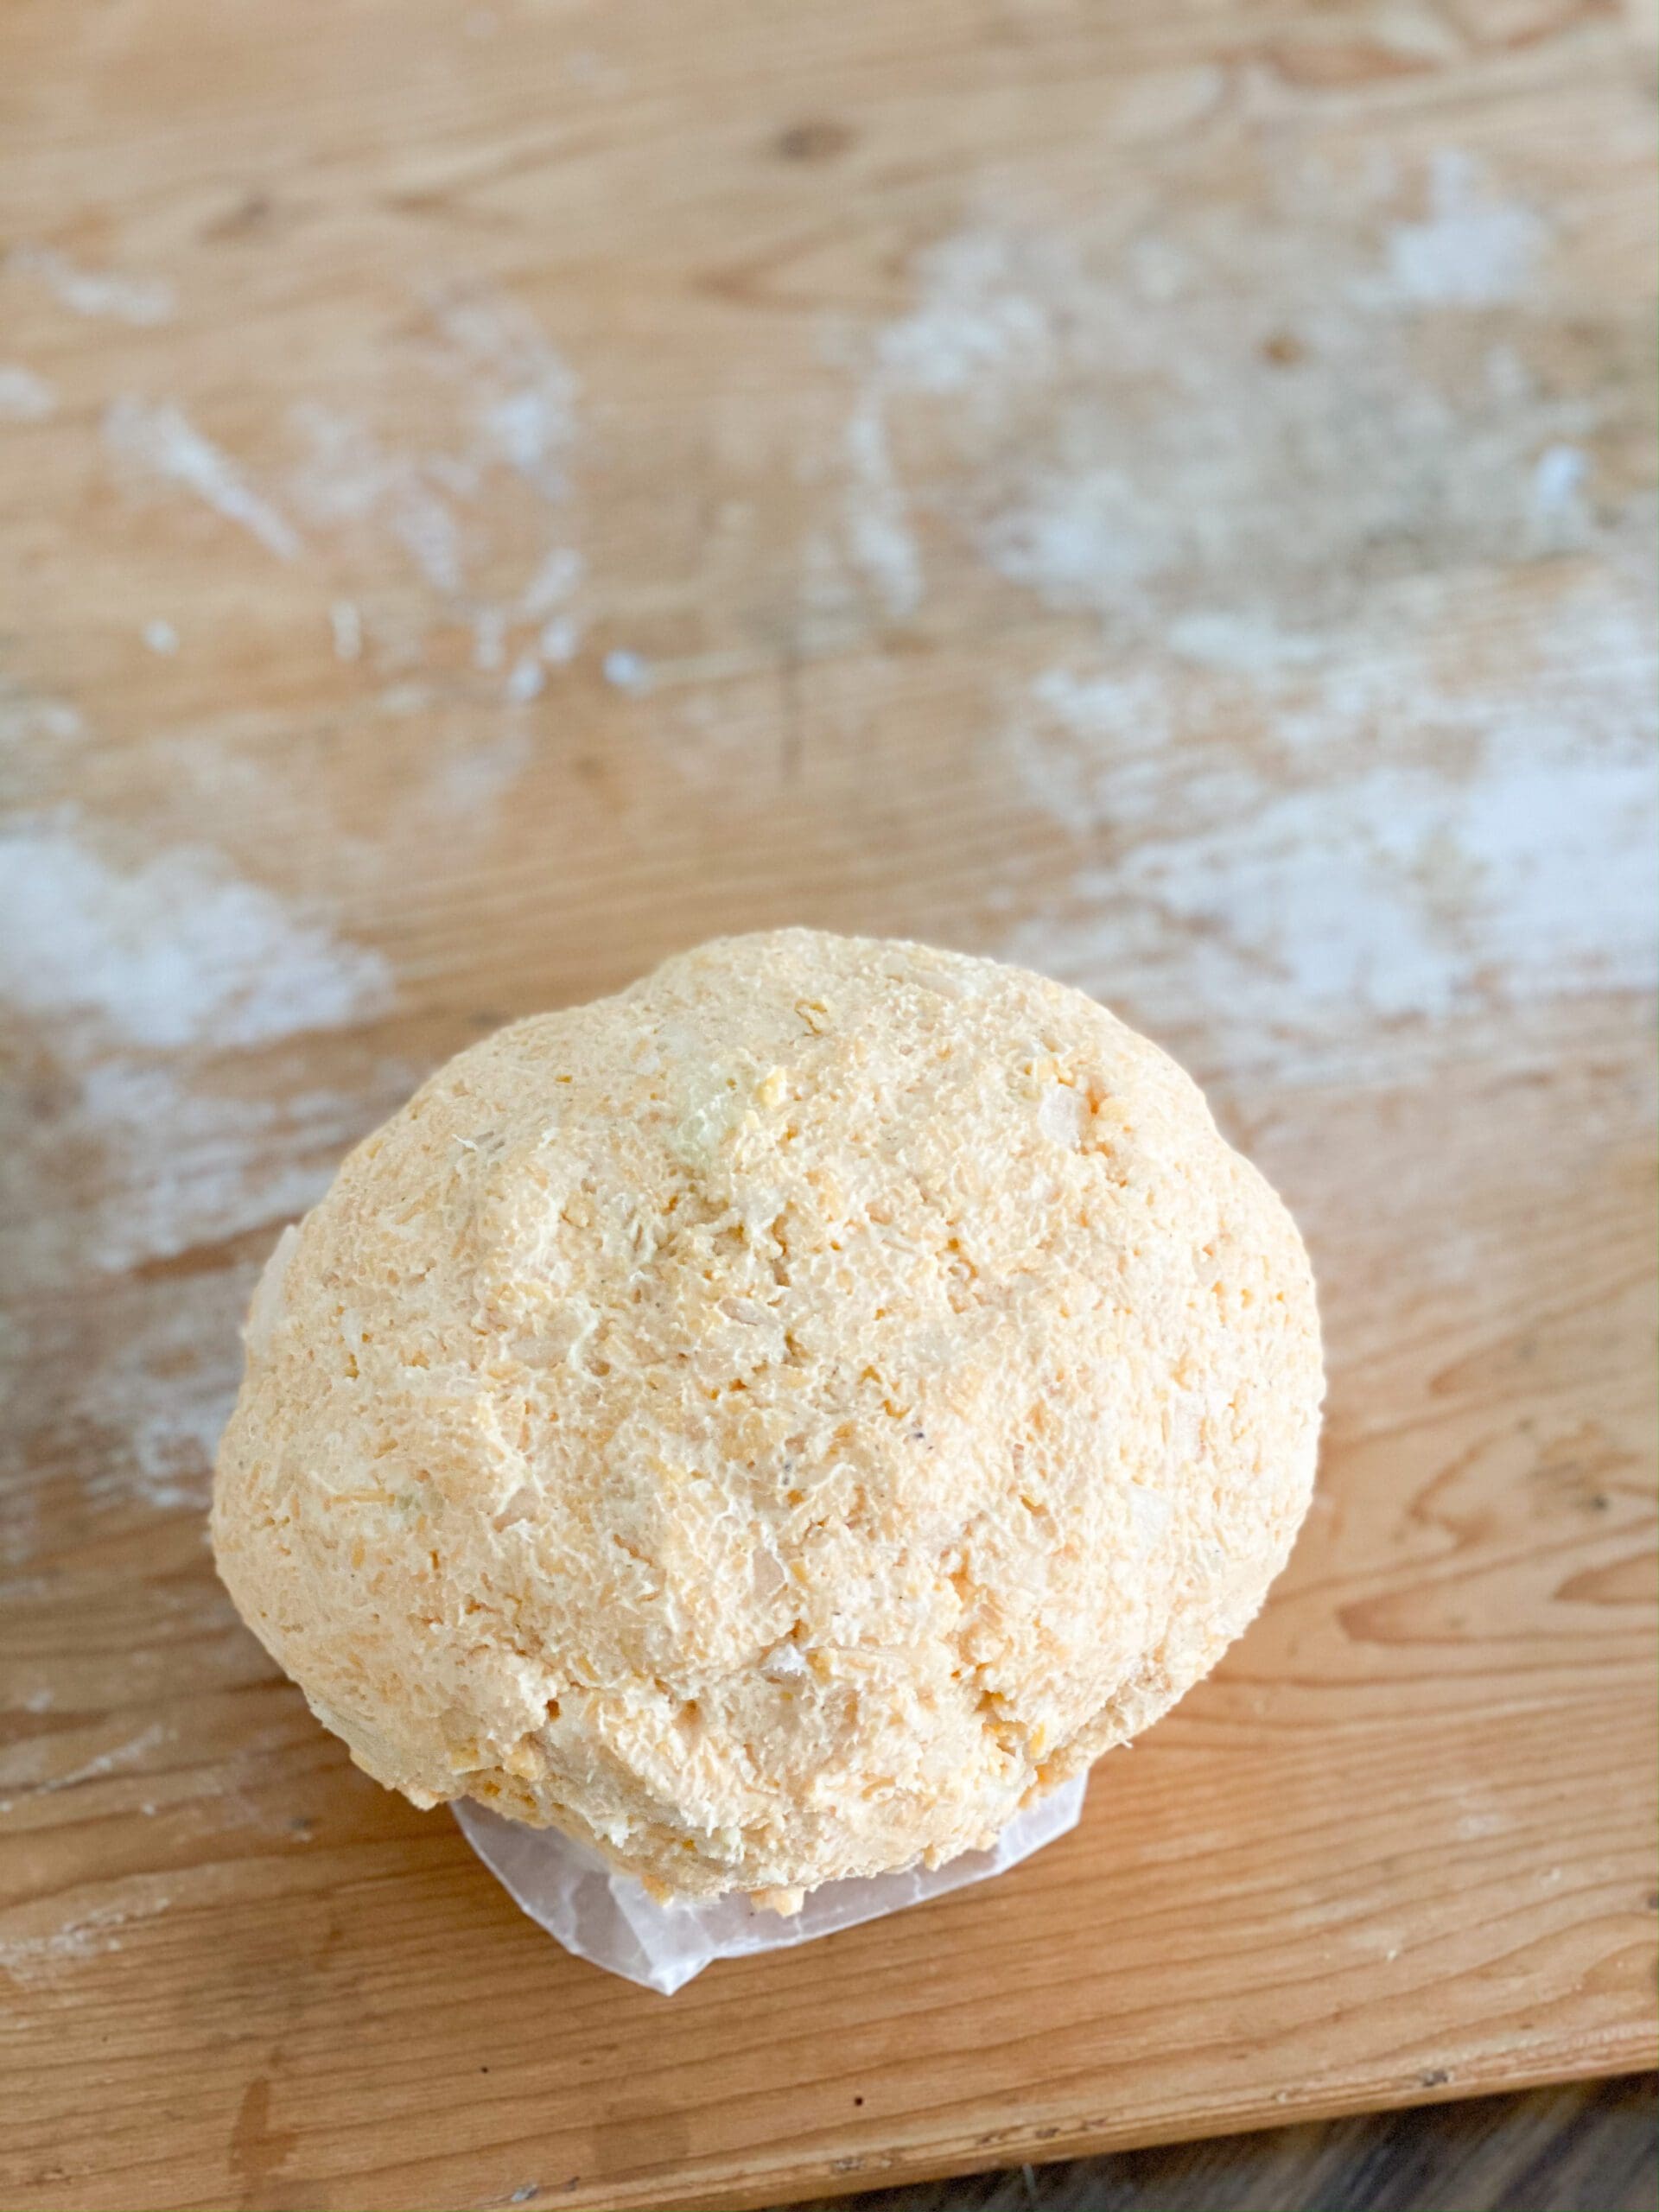
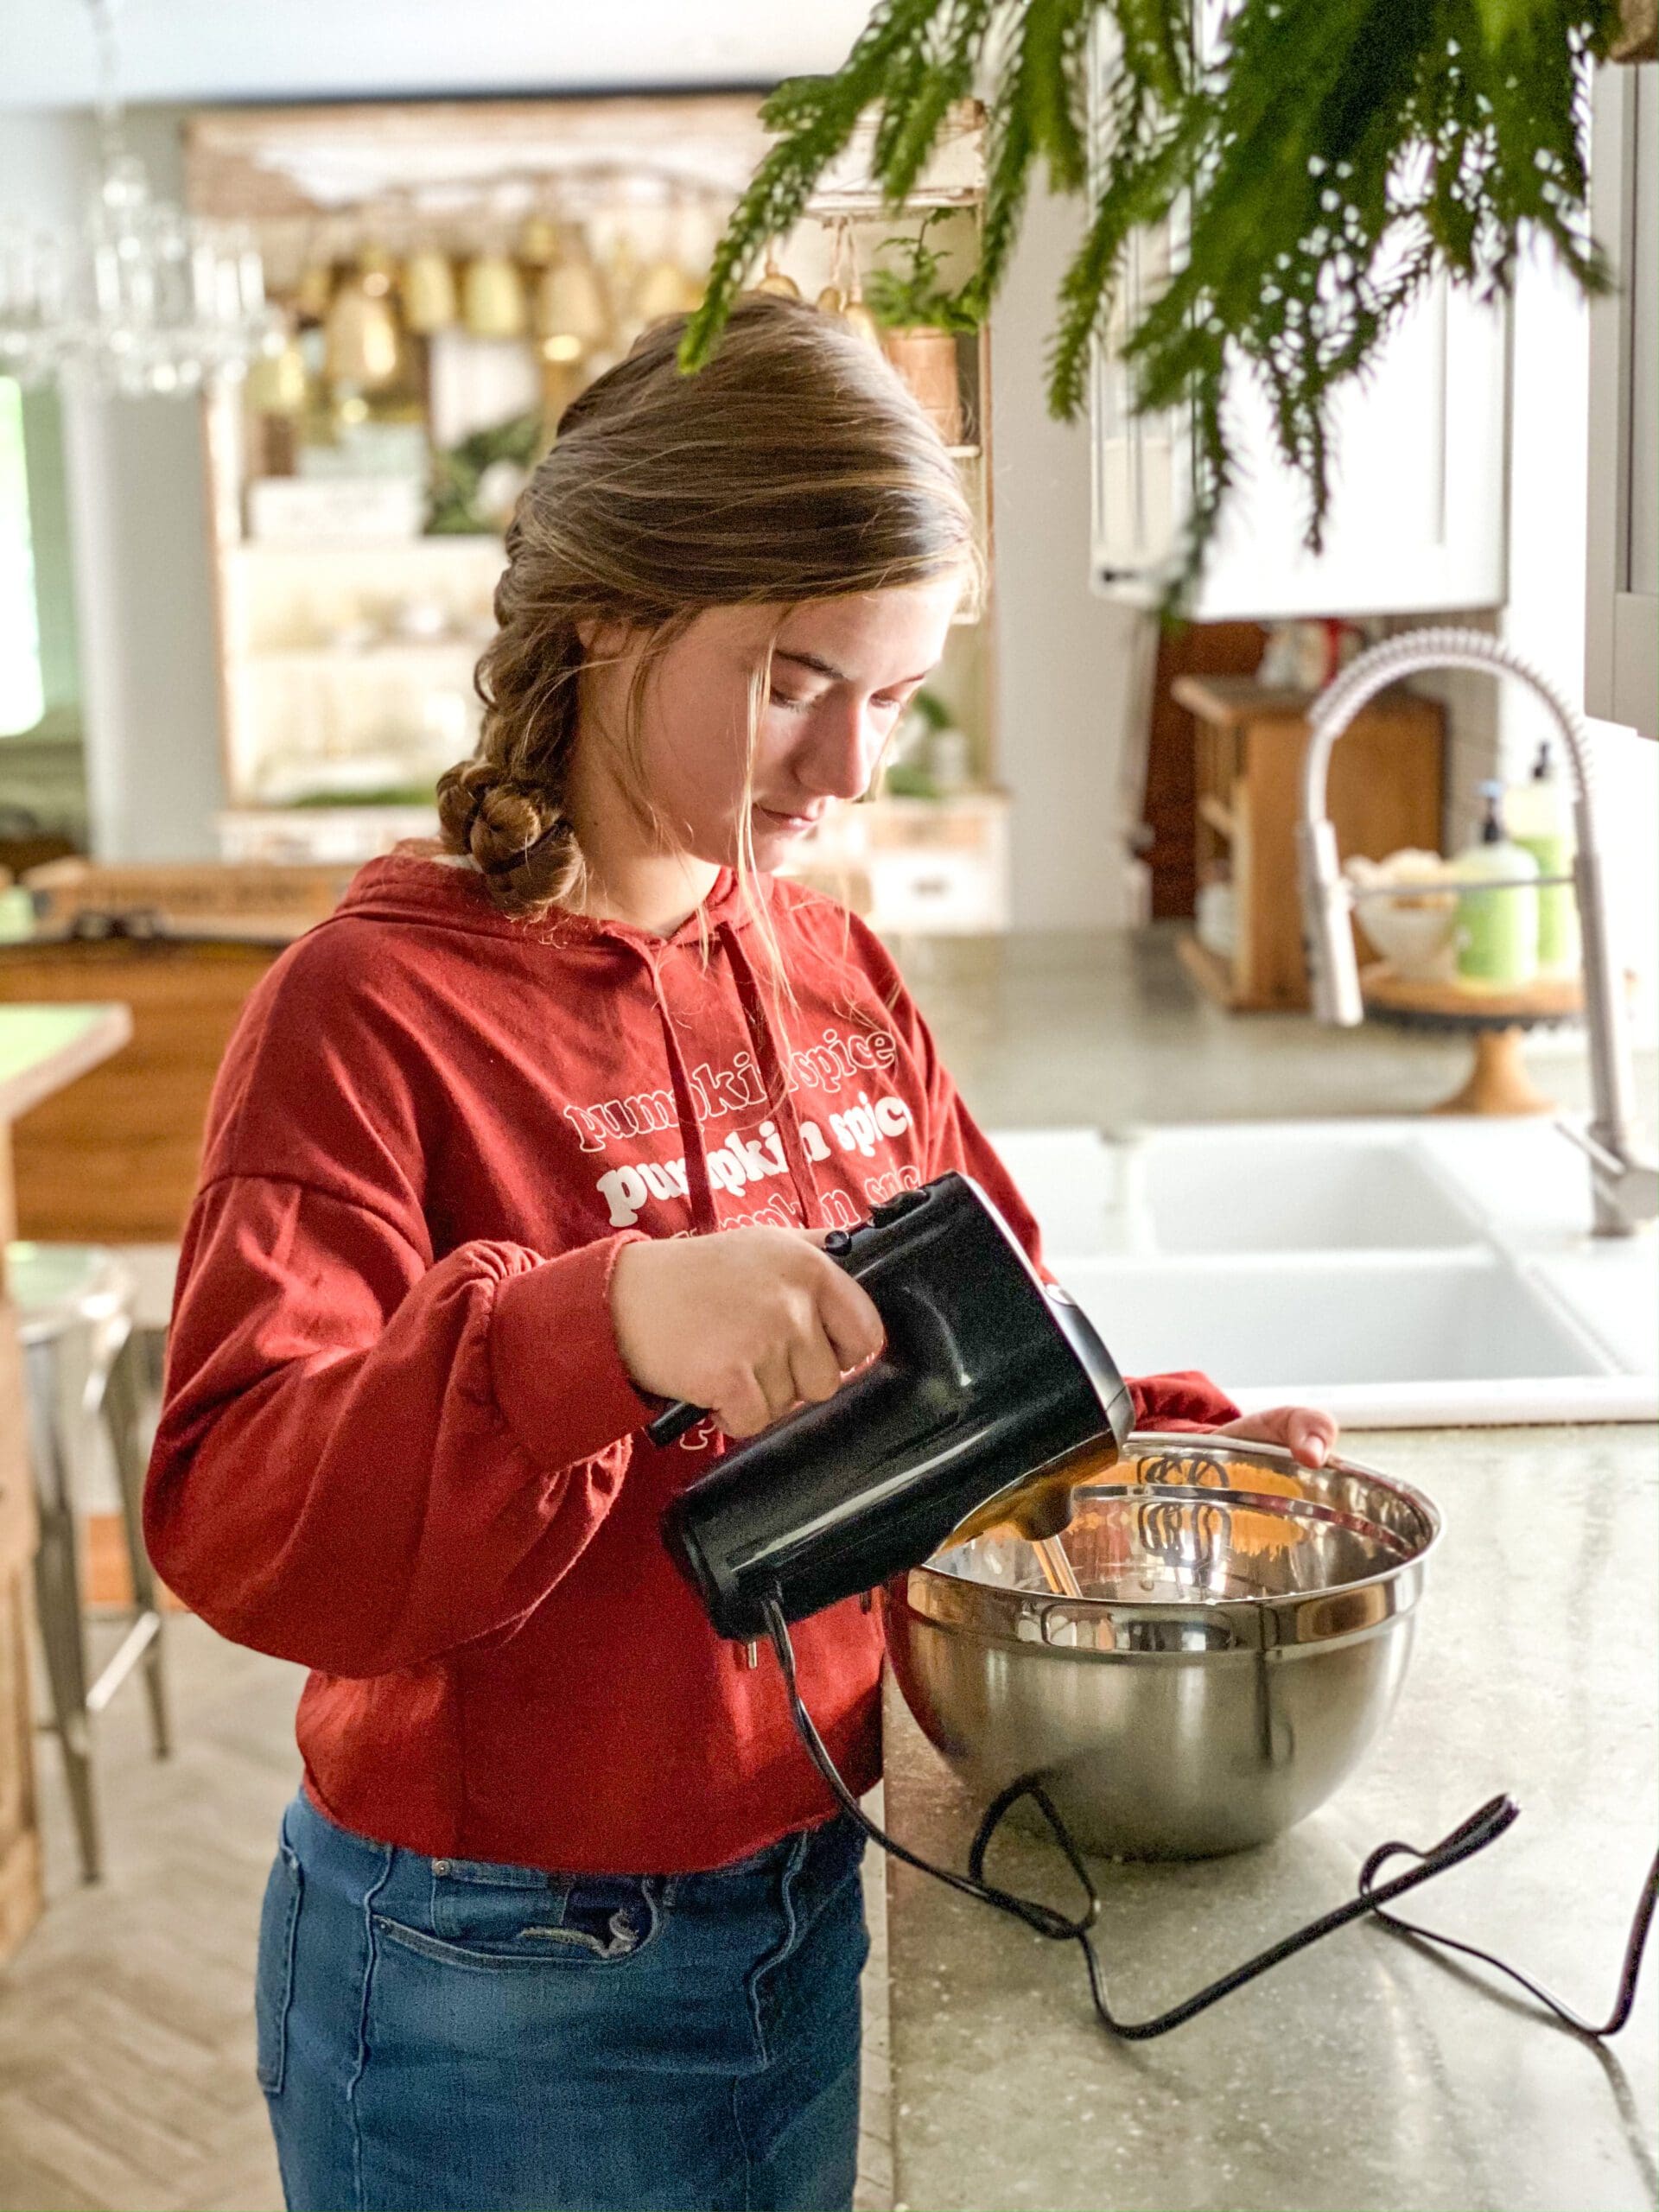
- Blend cheese, cream cheese, Worcestershire sauce. Salt & pepper well.

- Form into a roll or ball & roll in chopped pecans (optional).
- Wrap in waxed paper and place in refrigerator (for best results, leave overnight).
- For a variation, put the pecans in the cheese mixture & roll the cheese ball in chili powder.


Notes
There are a couple of very handy tools when making this dish. The first one would be an onion chopper. This amazing tool saved me from a long time of chopping and chopping and chopping onions for a while until they were small enough to be put in the roll.
It was very nice because all you had to do was cut the onion in fourths or halves depending on how finely chopped you wanted it to be, and start chopping away by pressing the handle down! I actually borrowed my grandma’s, but it is a good investment for those who cook a lot.

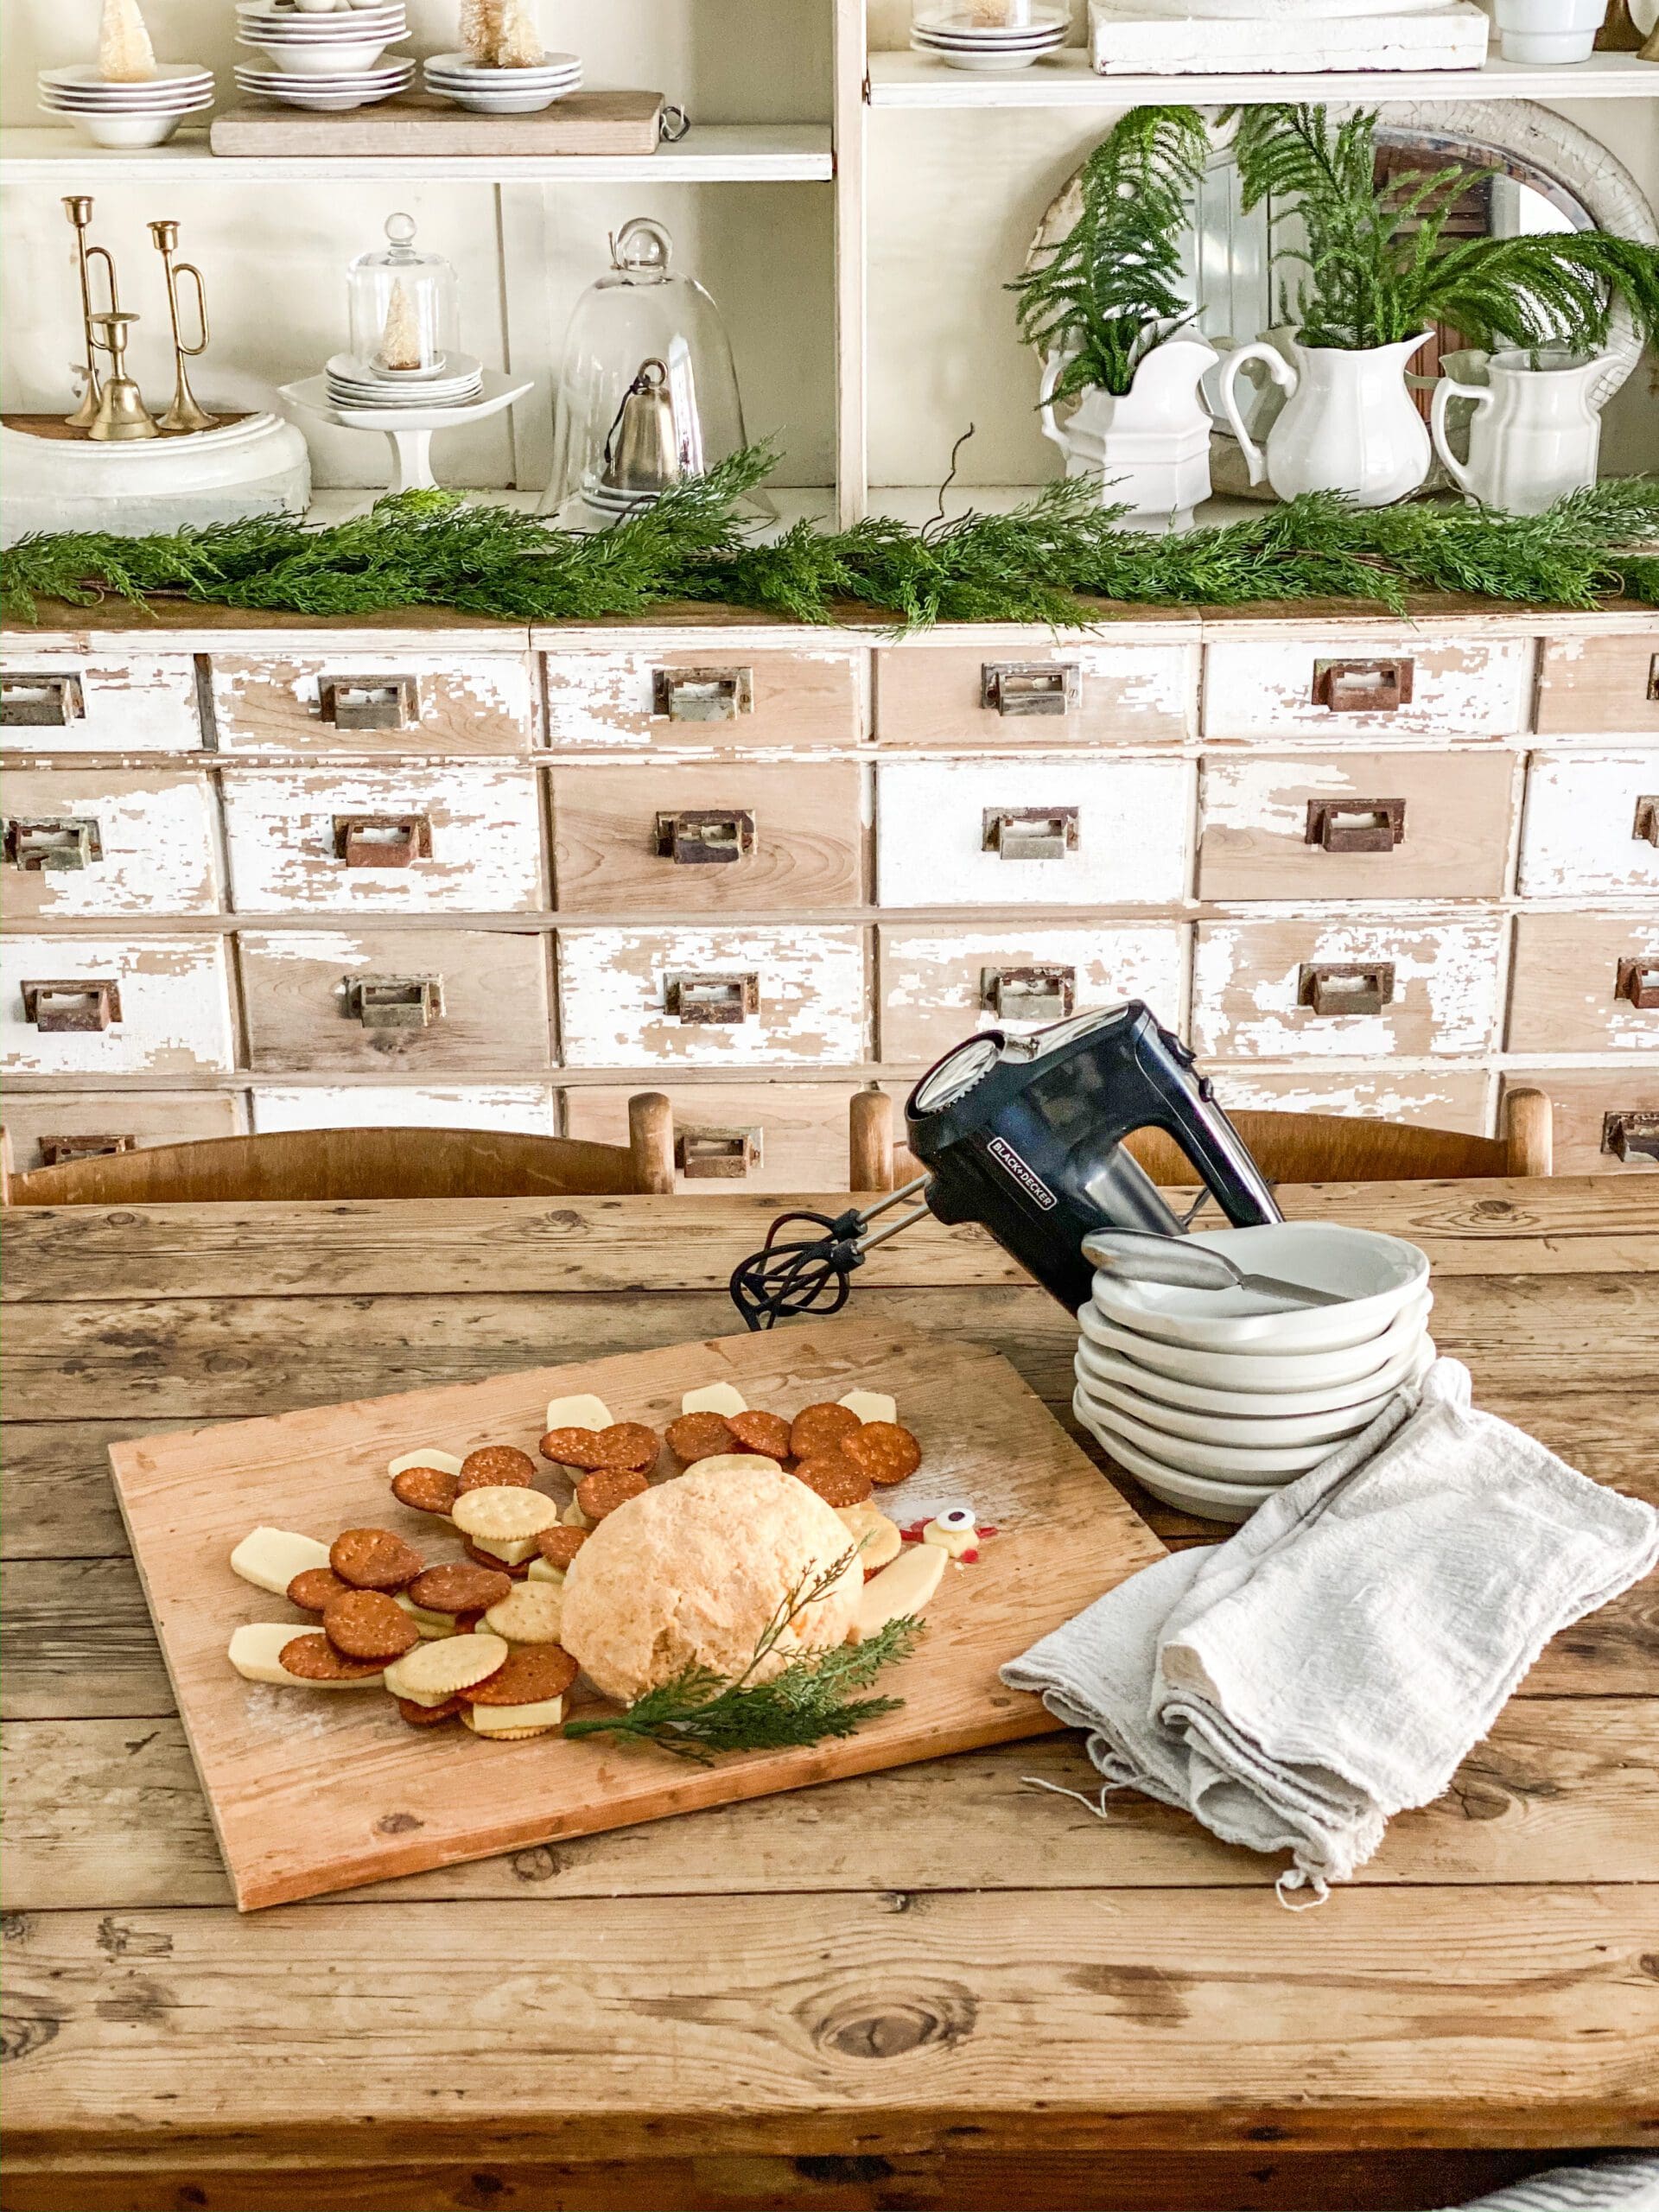
The other would be a cute vintage bread board or a charcuterie board. We have an abundance here at home, so I just grabbed one that would be the right size and shape for my project
The last and most important would be my new black and decker hand mixer. This amazing tool saved my life from a lot of kneading that cheese roll until it was all mixed in well. It is very handy because of its multiple speeds, a few different choices for whisks, including an actual whisk, some amazing helix attachments, and dough hooks.
It also has an awesome storing container for the whole thing, which makes maintaining it very easy. I definitely recommend this product for anyone spending any time at all in the kitchen as it can be used for pretty much anything and save you a lot of time and energy.

Tips for Decorating:
- Establish a pattern for your feathers. You can experiment to find just the right pattern for your turkey, but once you find that, stick to it! it will make your time much more enjoyable and less stressful.
- Give it a little bit of character. The last thing that you want is for your turkey to look realistic and detailed. You kind of want it to have a cartoonish feel to it. I did this by making the head too small for the big candy eye that I gave it. It looks like a bird with those beady eyes, and it really brought our turkey to life for me. You could also bring it to life with some sassy eyebrows, facial expressions, or wobbly little legs.
- Incorporate things that you love into it and make it your own. Get creative with it! I will share how I did our turkey, but I encourage you to come up with your own ideas that make it unique to you. If you like more than just cheese and crackers, add the things that you love into this amazing turkey charcuterie board! Everybody’s turkey will probably look a little different, but that is the goal: spending time with family in the kitchen to make something that is uniquely you. And, always remember that this is supposed to be a fun activity, not a stressful chore or thing to check off your to-do list. So have fun while you do this!

Cheeseball Turkey
Equipment
- Wax Paper
- 1 round candy eye (found at Michael's or your local grocery store)
Materials
- Circular & oval crackers
- 1 Block Sharp cheddar cheese cut into cracker-sized squares
- 1 Block Gouda cheese, wax peeled off, cut into oval slices (keep bits of red wax for decoration)
Instructions
- Get your rounded cheese ball and place on waxpaper that exact size. Place ball and paper at the base of your charcuterieboard or bread board.
- Stack in this order: round cracker, cheeseslice, oval cracker and place above the cheese ball.
- Then, stack more in this order: oval cracker,cheese slice, oval cracker and alternate with the first stacks so that neither pattern is next to one alike.
- Keep going, and depending on how big you want your feathers, do as many as you like. We did around three or four alternated stacks like that.
- Take the gouda cheese and place one at the endof each feather. Take two oval crackers per gouda slice and place two crackers angled away from each other at the bottom of the slice. Your feathers are completed!
- Take another gouda slice and trim it down however you like to be the neck of your turkey. You will want the end closest to the body to be a little fatter than where the head is going.
- Cut out of the sharp cheddar cheese a head for the turkey and place at the other end of the turkey neck. This is where you might want that red wax from the gouda. Cut off little ovals for the red headcrown and wattle, or dewlap (the red hangy thingy from its chin). Then add the eye.
- If you wanted to add legs, I suggest getting pretzel sticks for that. I did not because I hadn’t thought about that when I made my list of groceries, but it would be very cute!
I hope you guys have so much fun spending time with your family making this special treat. I have so many things to be thankful for, especially my family who I got to spend time with on this project an we had a lot of fun.
This definitely is one of my favorite recipes, and I thought it was super simple to make the cheese ball. I would love to see your turkeys! Be sure to share them with family and friends, and maybe use them as an appetizer or a centerpiece for a charcuterie board after thanksgiving dinner!
Lots of love,
Payton


Gallery
This is SO adorable. It is all in the presentation and the turkey kicks it above the ordinary!
I love it, Payton! So creative! Great-Grandma Hazelwood would be so proud of you!
Awesome job, Payton.
So very cute. Keep up your great ideas, maybe a cook in the making. Happy holidays
That Cheeseball sounds delicious. And the Turkey spread is so cute.