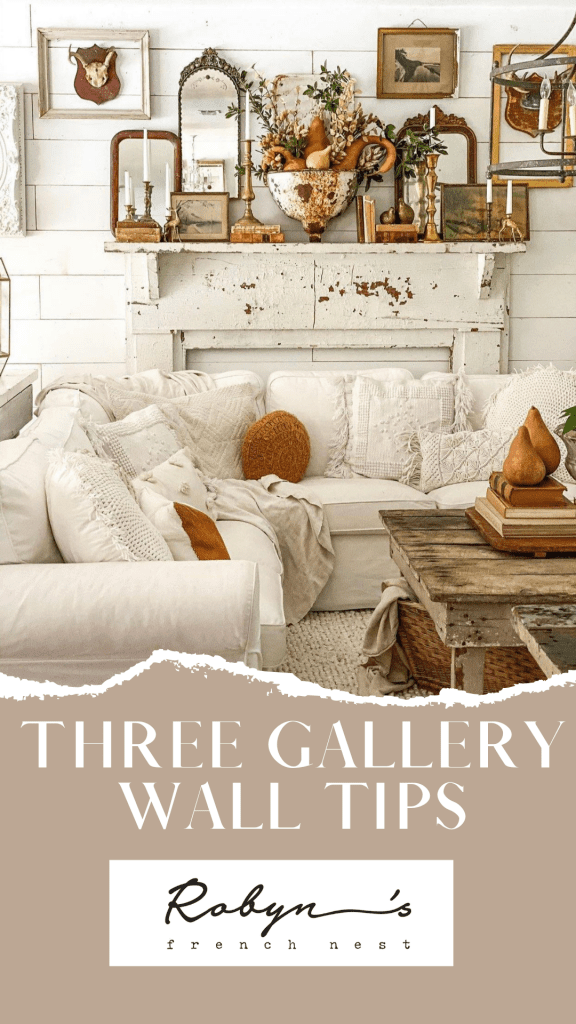
Gallery Wall Styling in 3 Simple and Easy Ways

Check out 3 simple and easy ways to style and arrange your gallery wall for a fall refresh! Budget-friendly and time-saving tips you can use to add cozy texture to your home this fall!
If you follow me on Instagram, you know I love to switch up the big gallery wall in our family room each season…and sometimes a couple of times a season! Why? That’s a great question!
I love to keep our home feeling fresh and interesting. Since changing out furniture all the time is both cost and space-prohibitive, I’ve found that I can make the entire space feel new (well, really old since it’s mostly vintage!) by changing my gallery wall. I think sometimes people feel “stuck” in their wall decor and I agree that it can feel a little intimidating or just hard to know what to do.
Let’s take the mystery out of gallery walls and have some fun with those under-utilized surfaces!
")
Why a Gallery Wall?
When you think of restyling your home, say for the fall season, you may think of throw pillows, a table centerpiece, bedding, a new candle, and replacing the coffee table decor. Maybe you go so far as to change up how you decorate the surfaces of console tables, side tables, and your kitchen island too!
I think of my gallery wall as another surface with great potential for adding the look and feeling of the season!
Redoing a gallery wall takes a little more time and maybe an extra set of hands, but it also makes a huge impact in any space. Most of the walls in my home have stationary decor, meaning I don’t really change them for any season. They are more permanent displays, such as family pictures, large canvases of our children, and the large mirror in our music room.
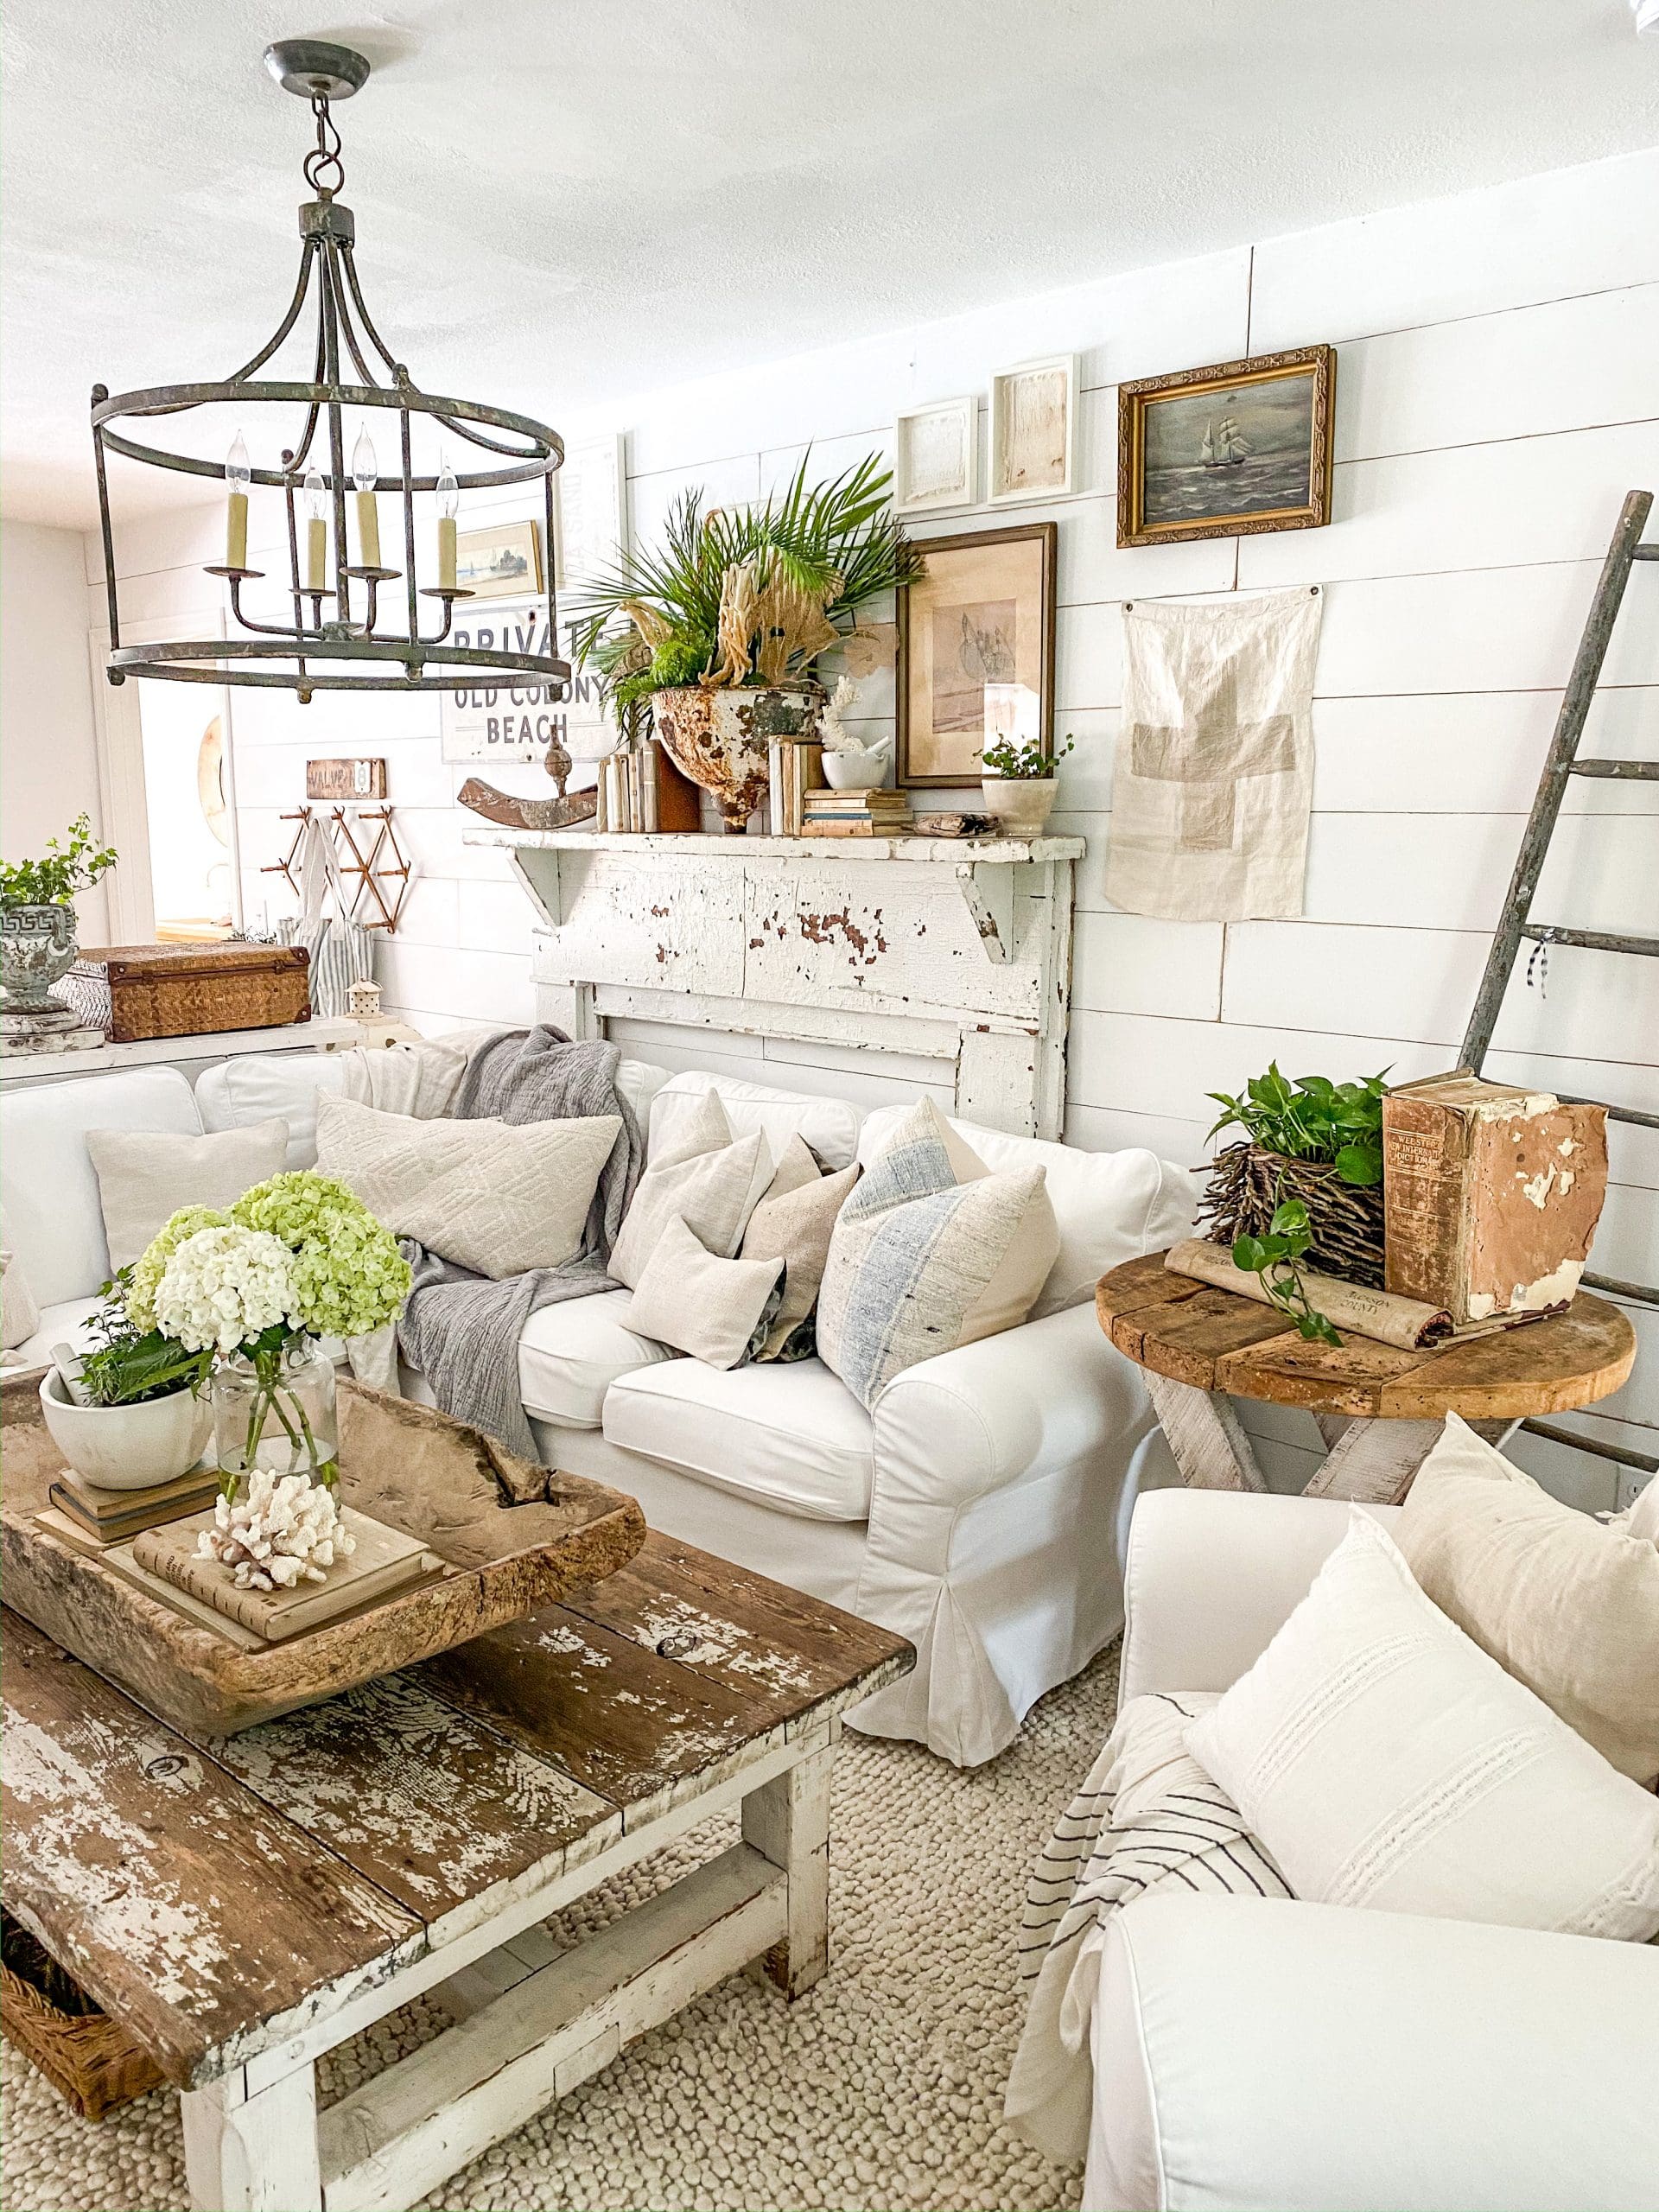
In our family room, I have reserved the large shiplap wall for a seasonally rotating display of favorite gallery wall pieces. I often use the same pieces, over and over actually, but mixing and matching them for a new look. It’s always a bit of a creative challenge and in artist terms, a fresh canvas!
")
Before we dive into the how and what of gallery wall styling, let’s address a super important topic.
Your art (i.e., gallery wall) is YOURS! You have full license to be creative, to experiment, to dislike it and start over, to love it and keep it up as long as you want, and to just have fun with it!
I hear so many people say, ” I like that but I can’t use it because it’s not my style.” Or, “It won’t look like the decorating of ___________ (insert your inspiration).”
Guess what? It’s not supposed to look like anyone else’s decor and it definitely does NOT have to fit a defined decor category. If you love it and it feels like home to you, that is truly all that matters.
My home is not what everyone else loves. I may have too much decor, too little decor, pieces that are too old or too mismatched, decor that is too farmhouse-y or too primitive. It. Doesn’t. Matter.
You are not held to a certain trend, style, or opinion of anyone else! Just have fun and love your home!
What Should I Hang On My Gallery Wall?
Well, in response to my passionate novel above about how your decor should be what YOU love, the answer is really whatever you love!
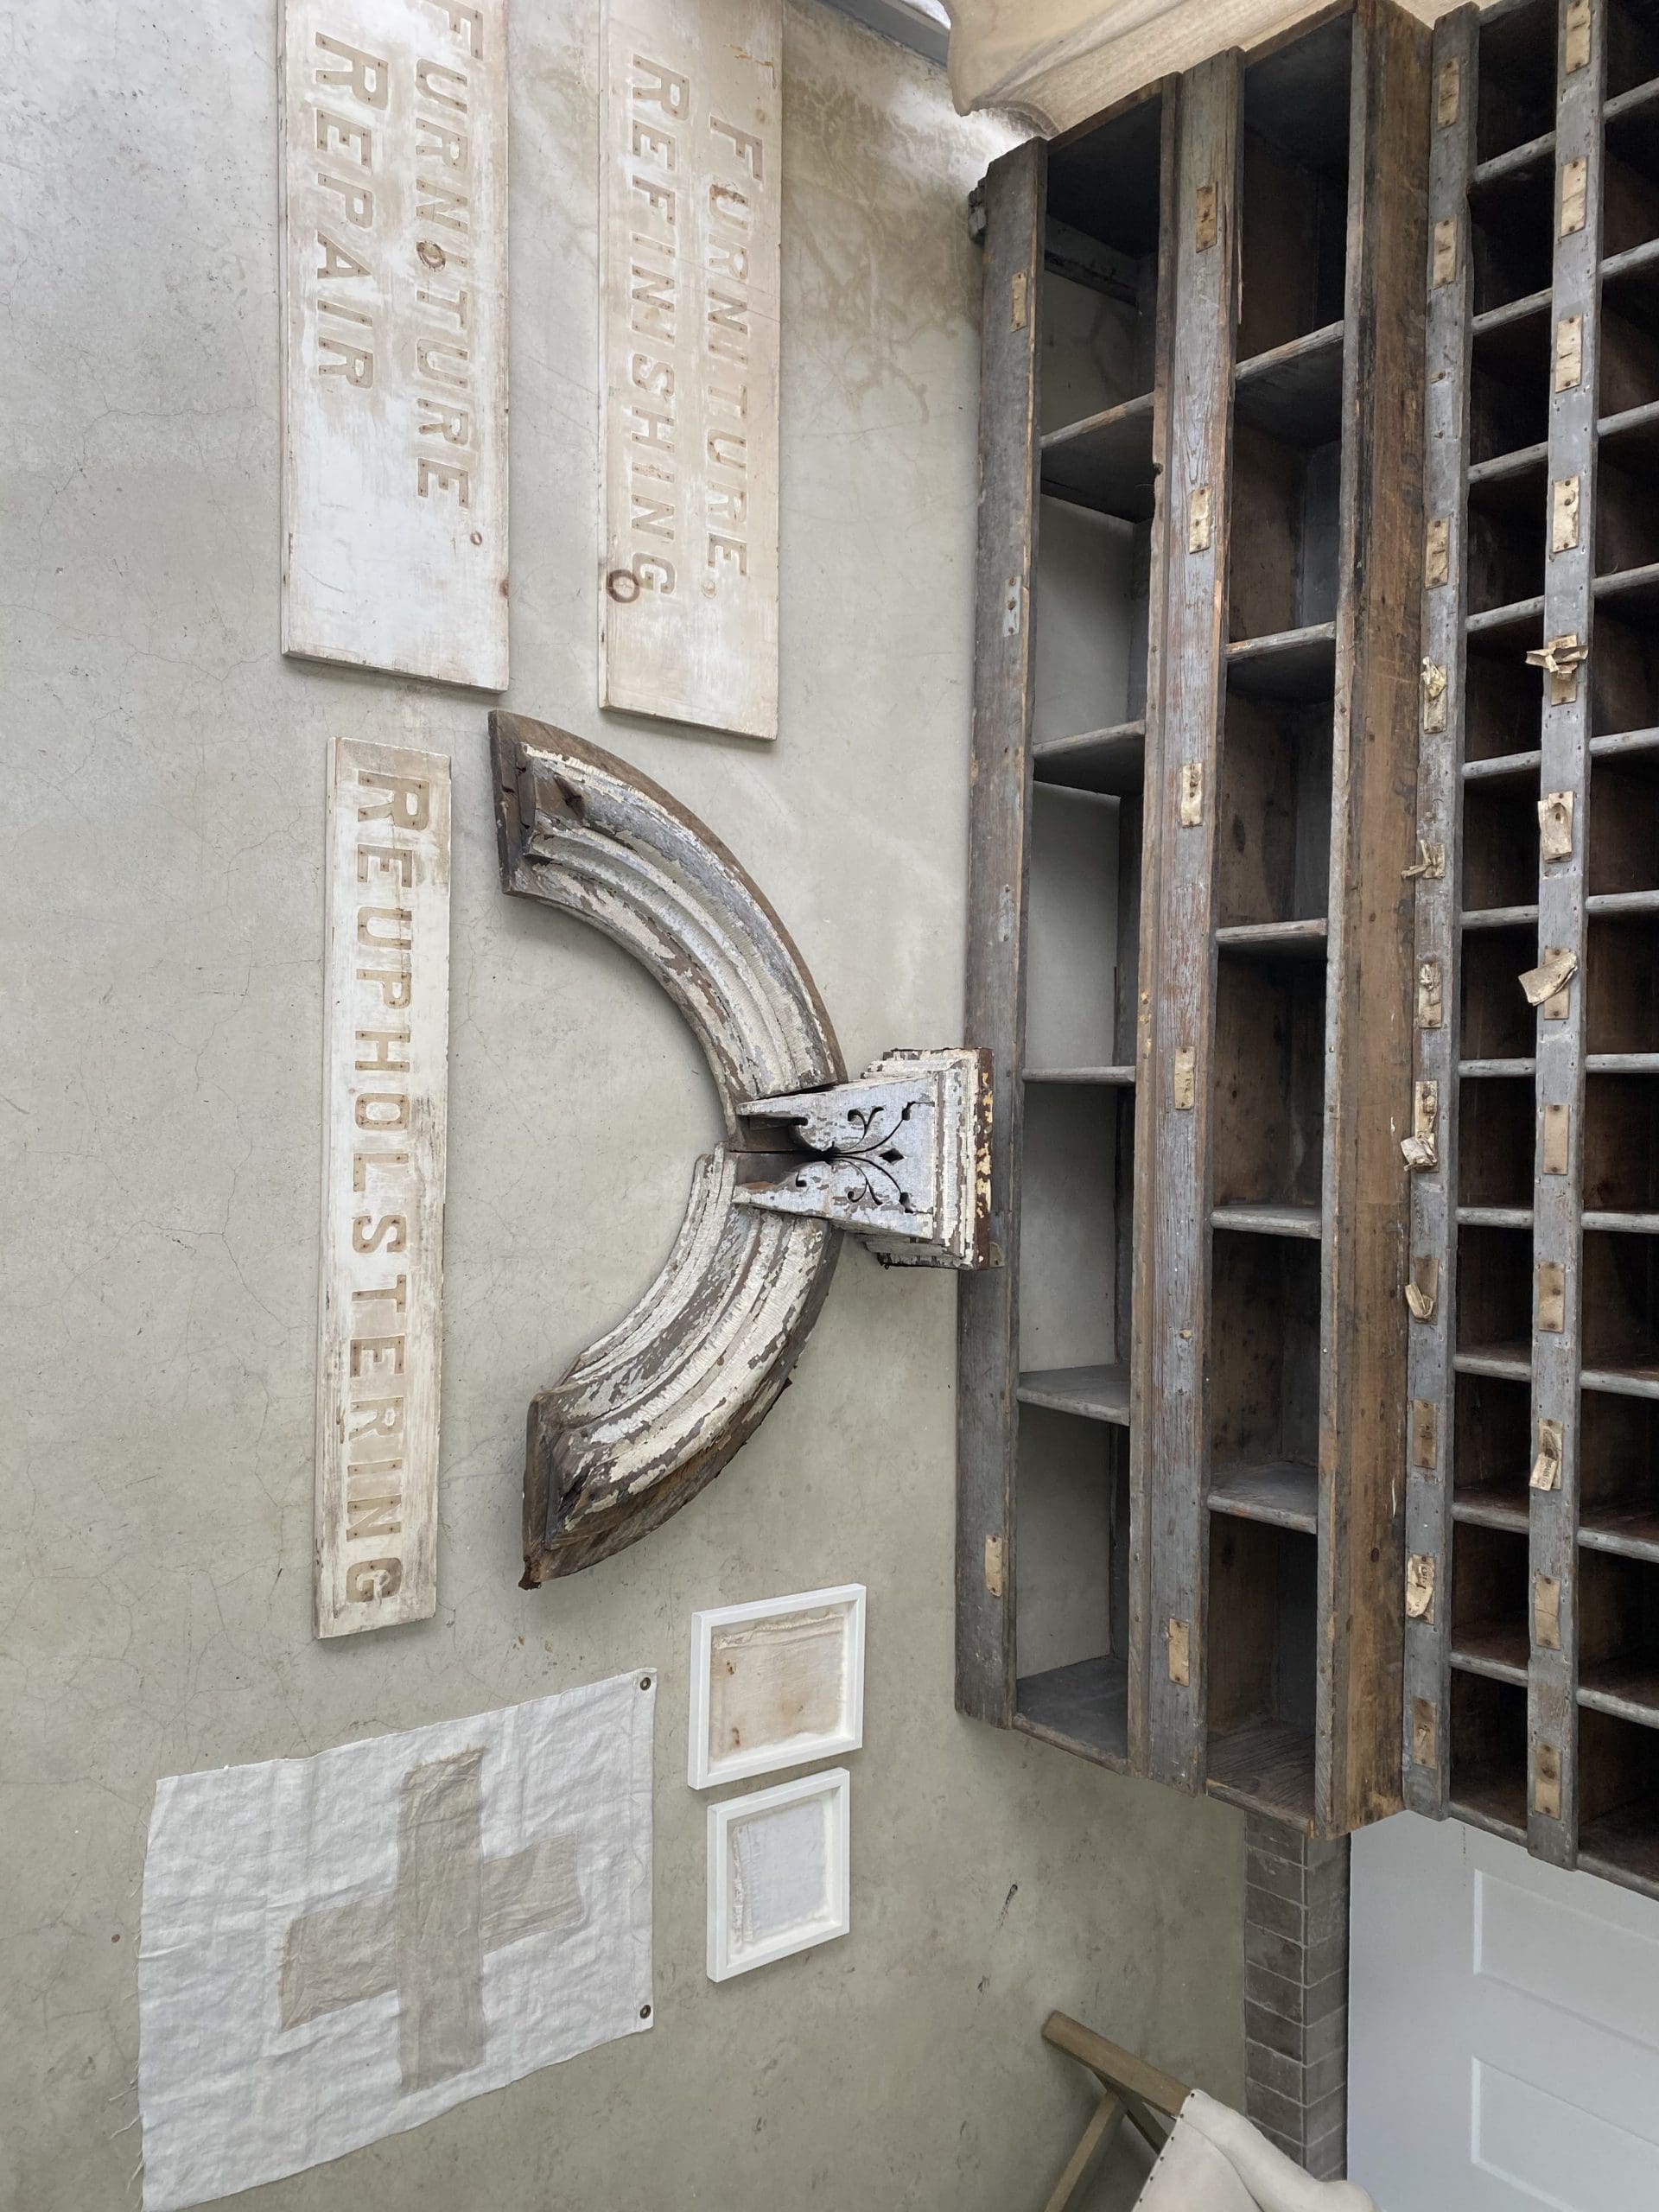
I am always looking for items that would be fun and interesting to hang on my gallery wall and I especially love to look at thrift stores, flea markets, vintage shops, yard sales, and antique malls.
Here are a few kinds of things I keep an eye out for:
- Vintage art
- Mirrors
- Architectural salvage
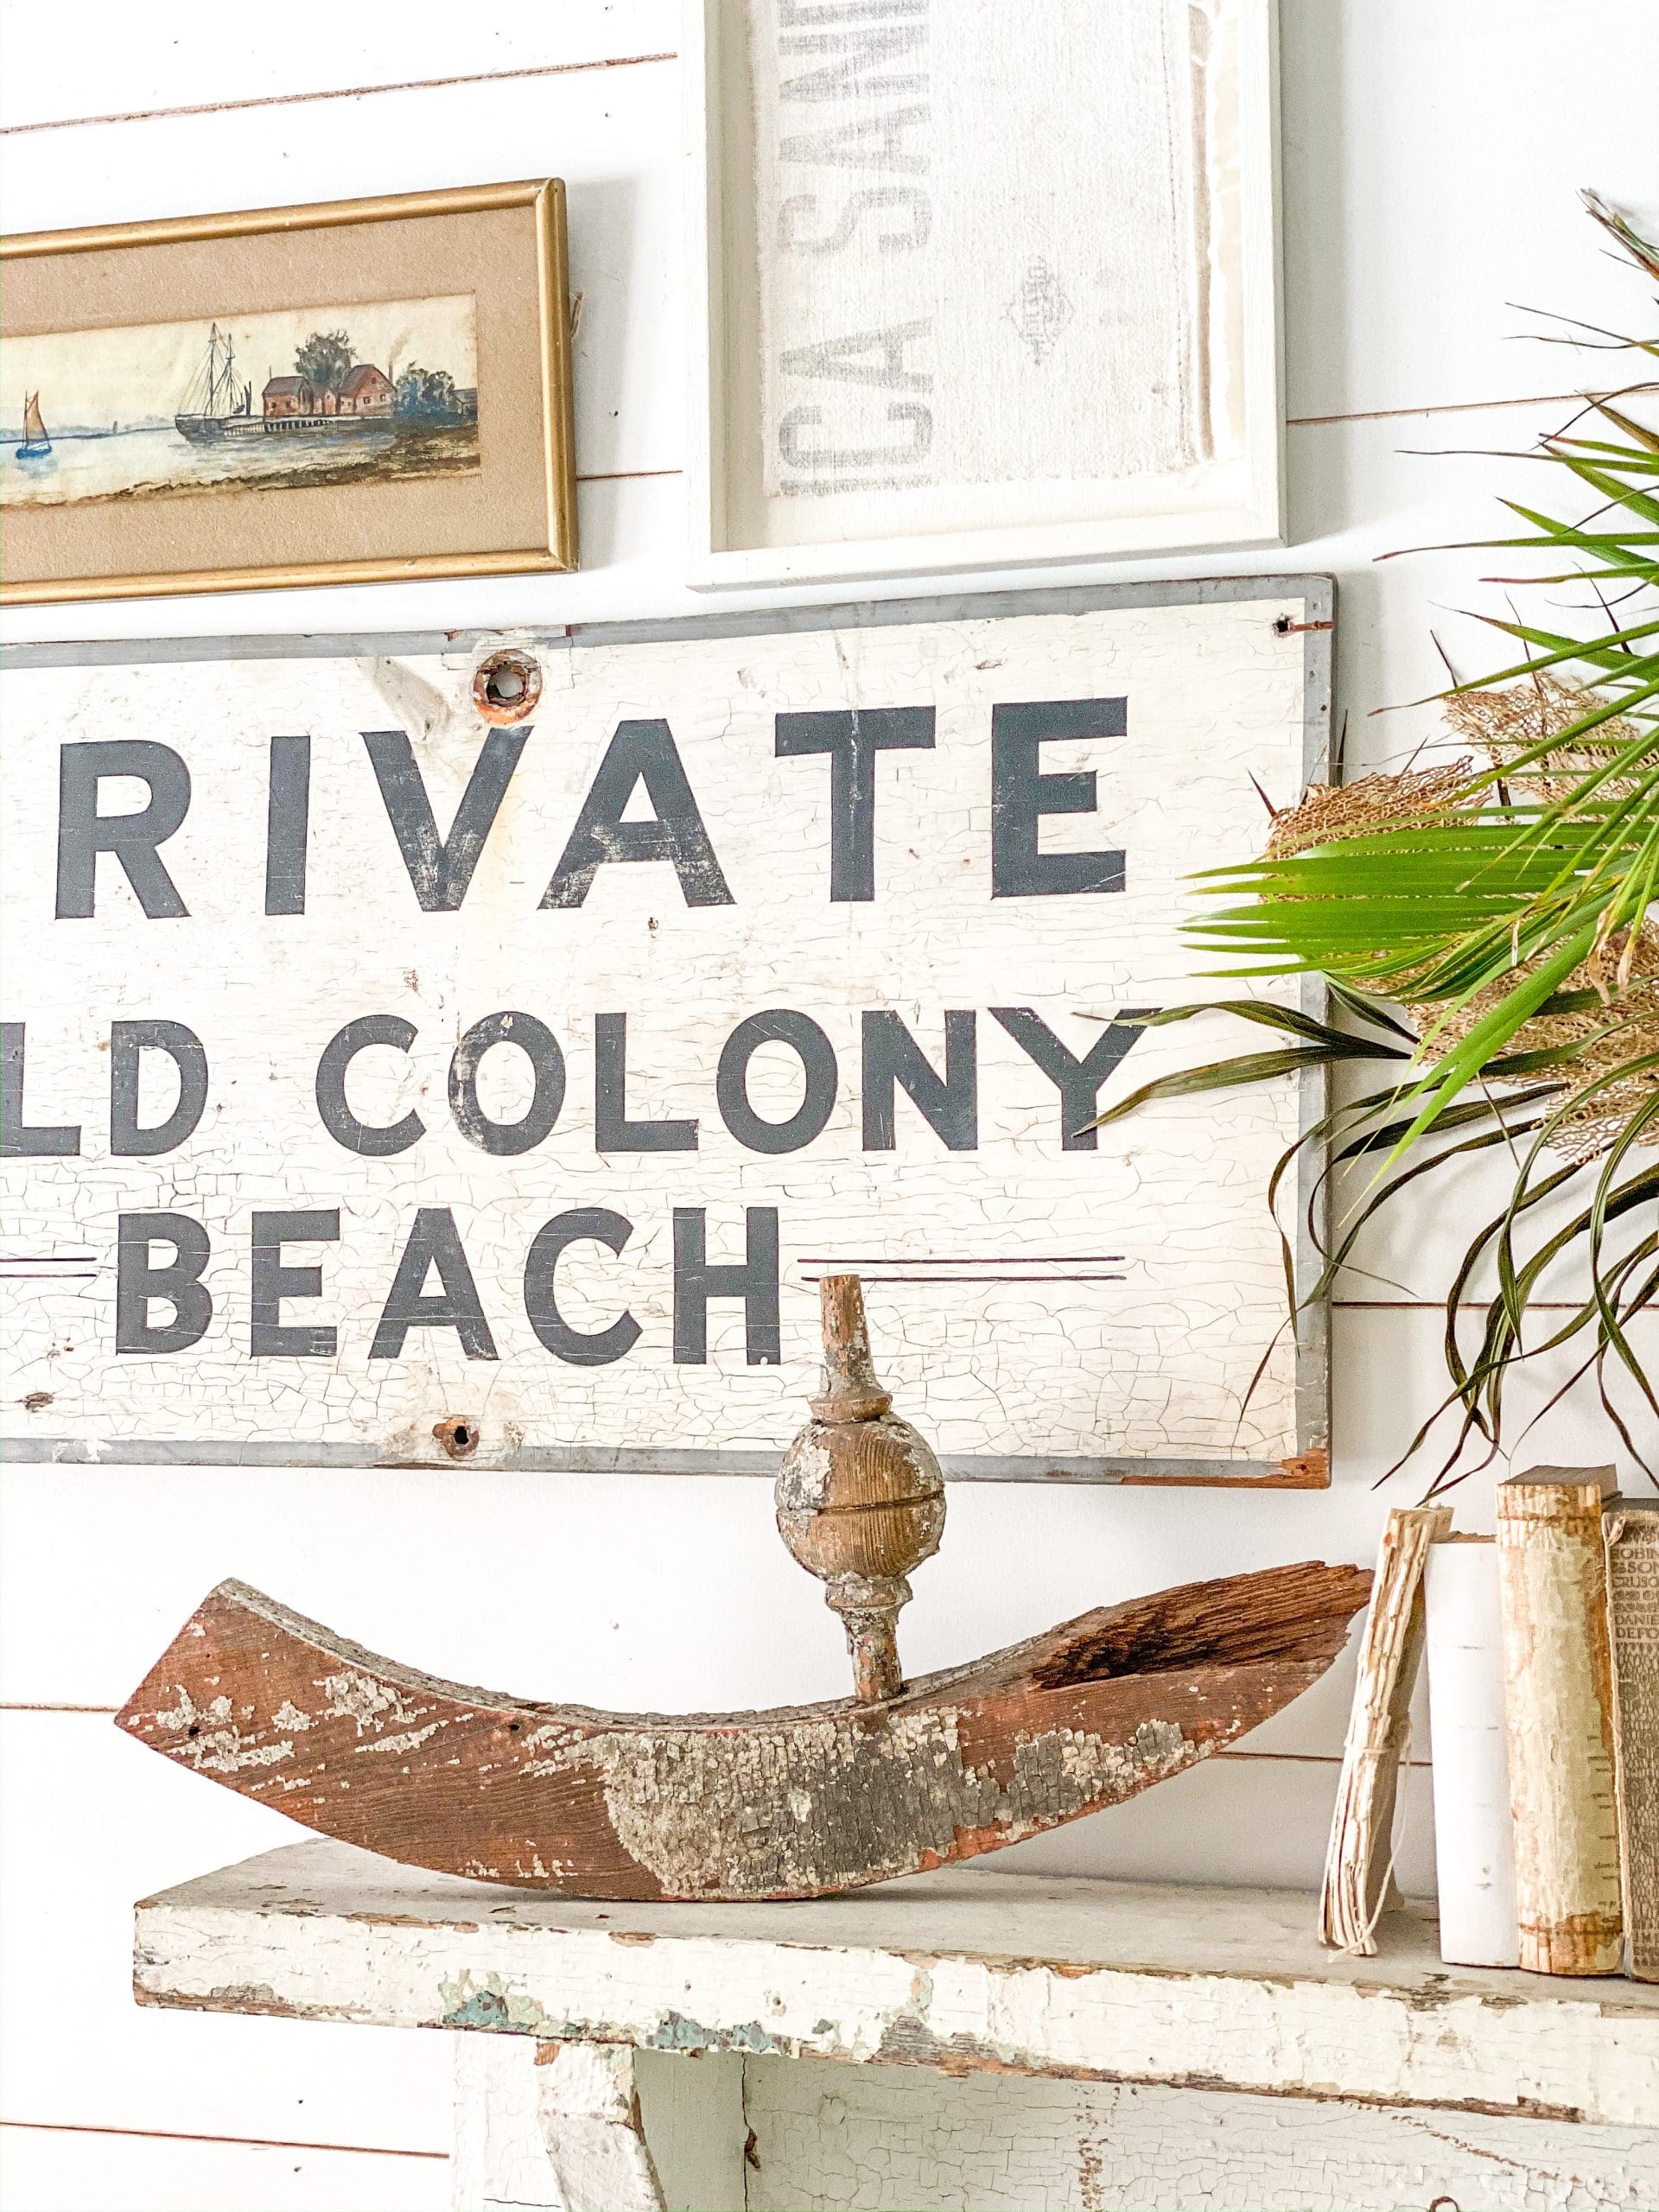
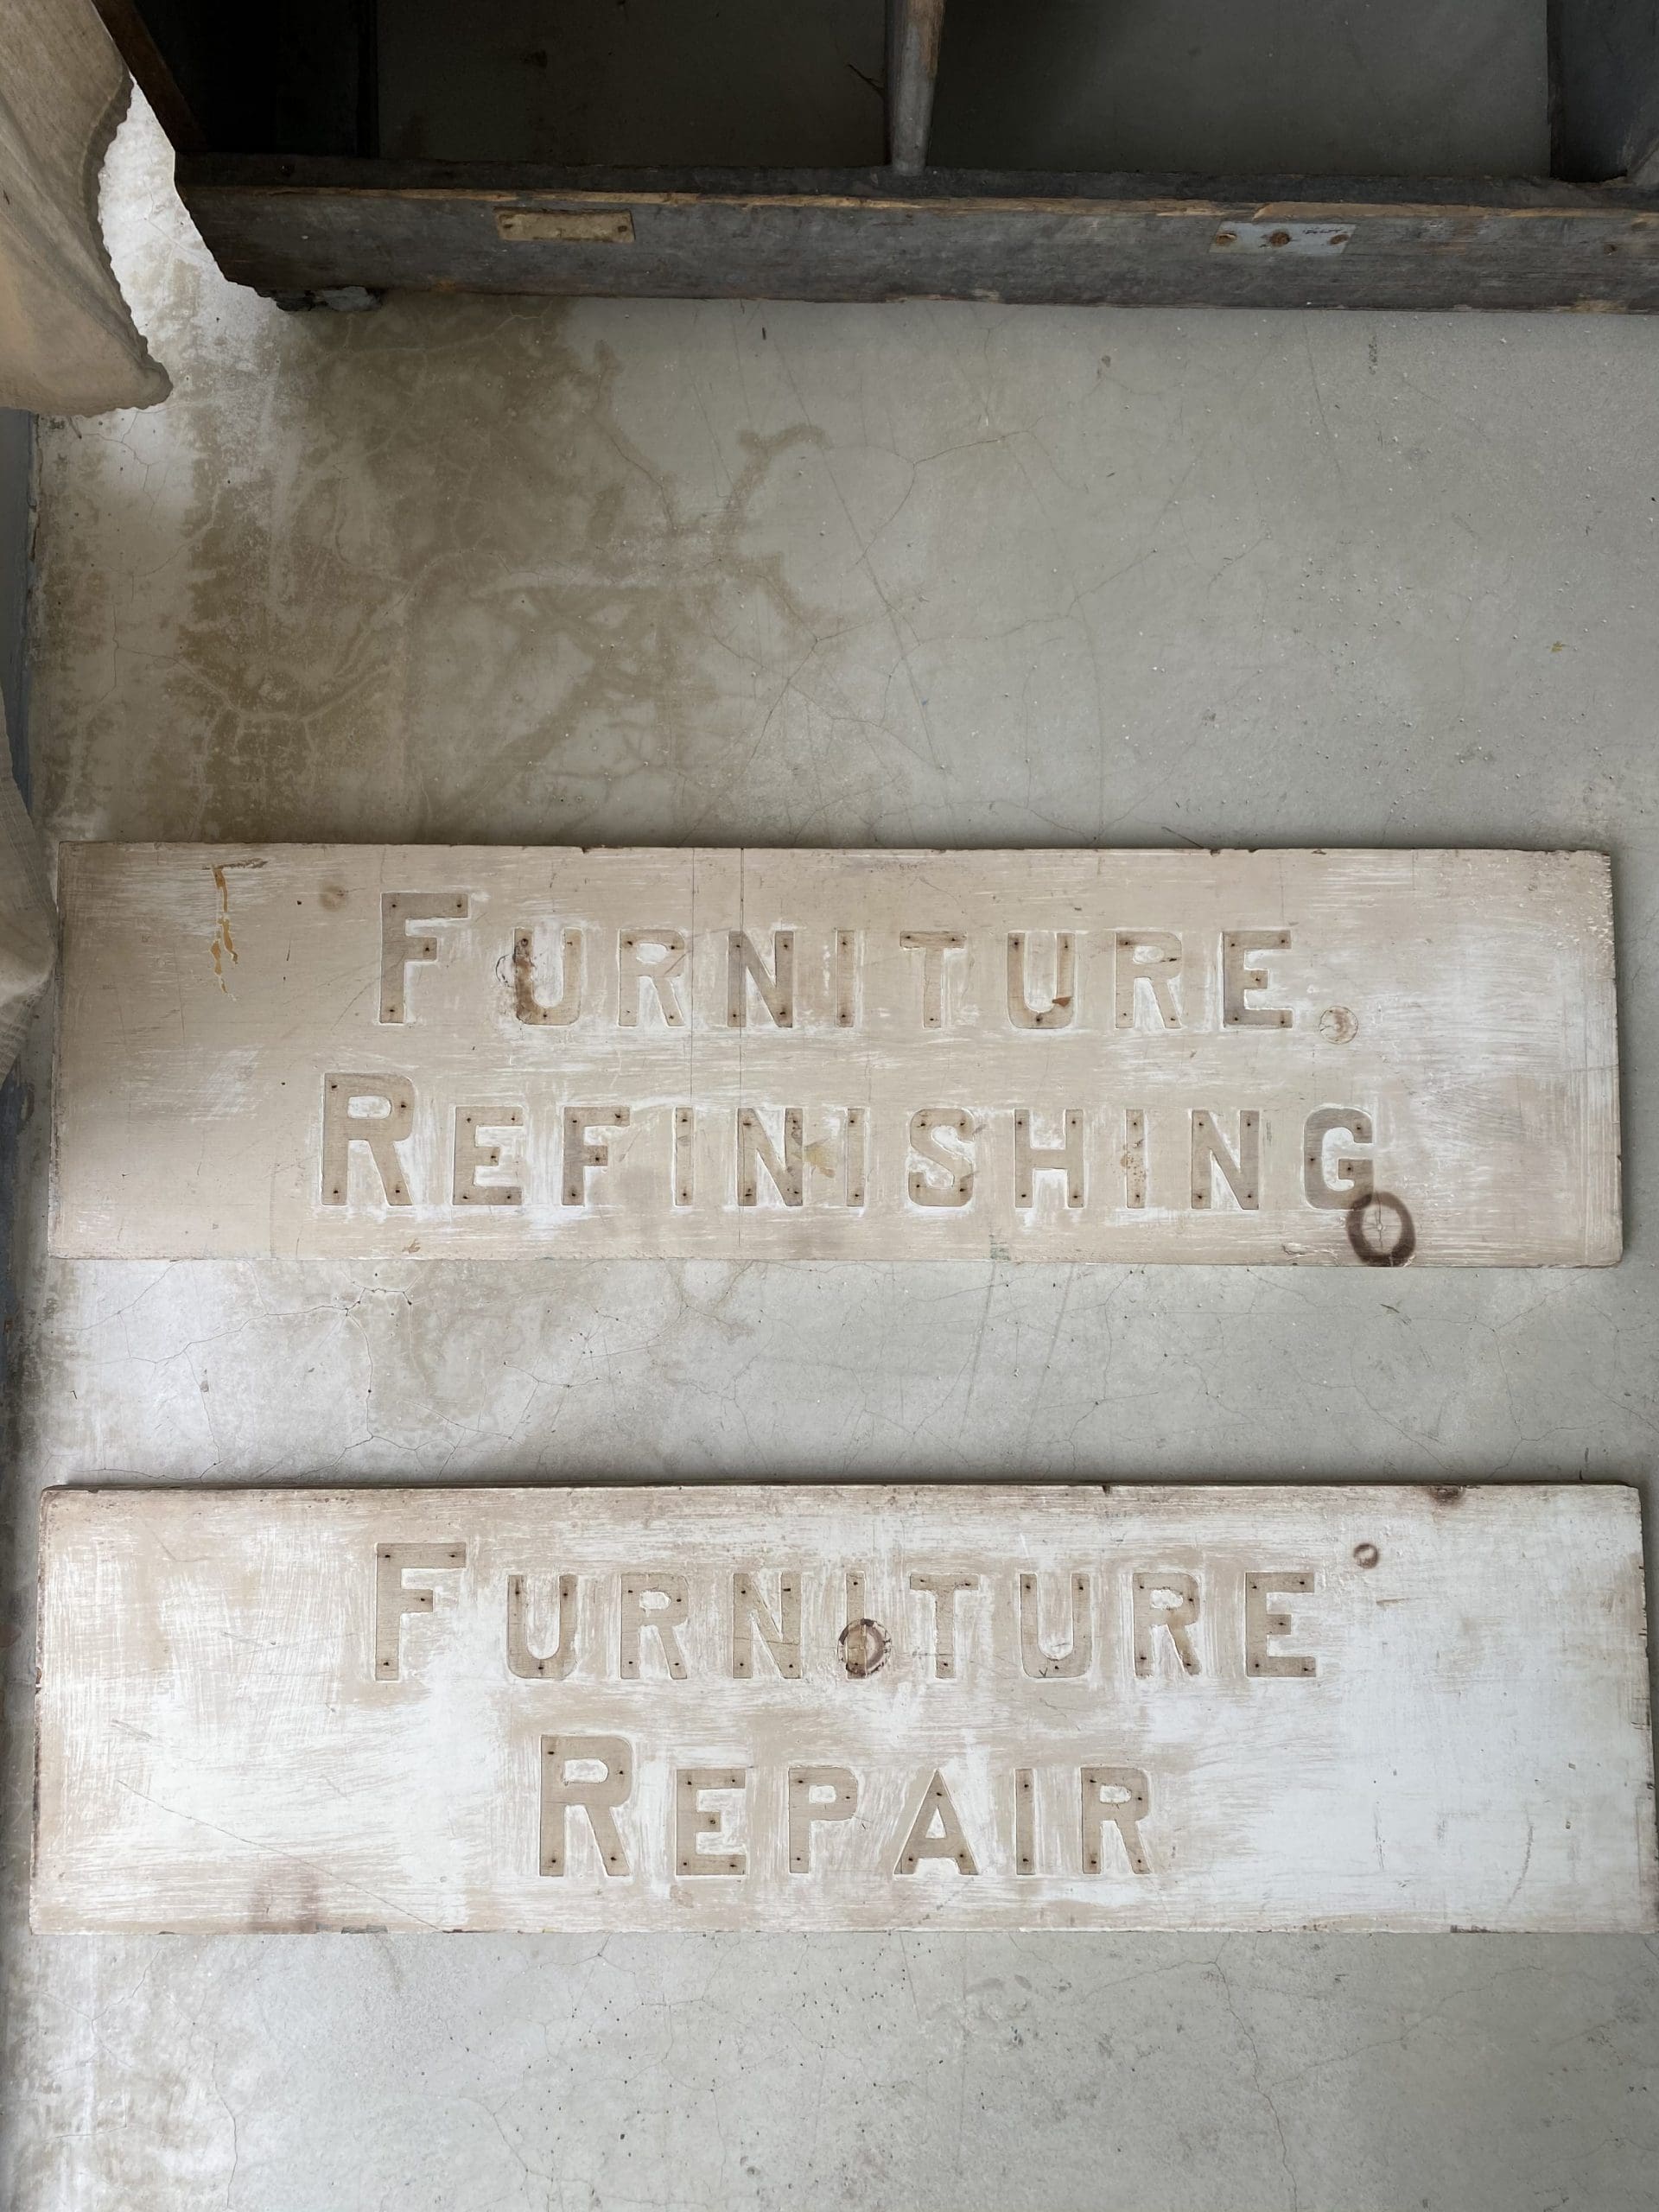
- Old signs
- Vintage frames
- Think outside the box! Look for unique items that can hang on the wall, such as baskets or even seasonal things like snow shoes! One of my favorites that only cost $10 are a pair of old hymnal racks from a church pew. They offer some depth and contrast, but are small, shallow, and easy to hang.
")
You’ll want to consider the placement of items on your gallery wall in relation to furniture below it or what kind of space you have.
In my family room, my gallery wall is mostly over the sectional. This allows me to be able to hang some different kinds of items, even if they stick out from the wall a little bit. If your gallery wall is in a hallway, of course you need to plan accordingly!
If you have the opportunity to position a gallery wall over a piece of furniture, such as a console table or sofa, you get a little more freedom to think outside the box as far as the size and scale of your items.
As much as possible, I like to add items that offer a variety of texture, shape, size, and dimension. Last fall, I used a vintage French lavabo as the centerpiece of my gallery wall. It juts out from the wall a good 8 inches or so, but because it is over the sectional, no one is at risk to hit their head! That is such a fun piece to style and I may just have to do a couple of different gallery walls this fall so I can use it again!
Pieces that can hold arrangements, such as pumpkins, gourds, dried florals, or faux greenery are a great way to add a lot of texture. Baskets that are flat on one side are a great option, too, as you can add a lot of life to your gallery wall with greenery and flowers! In the fall, I love to use dried branches…FREE from my backyard!
This is a good example of how you can restyle your gallery wall in an inexpensive way. Invest in a few pieces that can be styled different ways, such as baskets or the vintage French lavabo, can be used season after season with budget-friendly changes to what you put inside!
")
How to Start Arranging a Gallery Wall
Gather all the pieces you think you may want to use.
I gather everything that I think I might possibly want to use. After getting a general idea of the theme and style, I use a open space on the floor. I don’t worry about measuring it all out with precision. You just want a rough idea of the space you’re working with. And remember, it always looks much better up on the wall than laying on the floor!
")
I start by playing around with the layout, usually working from the middle out. As I go, I keep a few rules of thumb in mind:
- Consider a focal point. For me, that is usually one thing (or a grouping of a few things) in the middle. OR, statement pieces that offer symmetry on each end of the gallery wall, such as architectural salvage or mirrors
- Consider balance. For example, you don’t want to have all large items on one side and a bunch of little things on the other side.
- Work in three’s. Just as I work with a decor triangle when styling a coffee table, I keep that in mind with a gallery wall too. Remember, it’s not a perfect science, just a general guideline to get you started!
")
Symmetry Vs. Asymmetry on a Gallery Wall
What’s the rule?
Surely you know what I’m going to say! Do what YOU love!
That being said, if you’re still wondering, I’ll share my humble opinion.
I love some symmetry but not too much. For example, if I have wall sconces that are flanking my gallery wall, I do not want to also have two coordinating pieces of art lined up next to them.
Instead, I would take that art, add a third piece with some texture, such as a wall basket with greenery, and arrange the three items in the middle with a decor triangle in mind. By doing this, I get symmetry AND asymmetry, without too much of either one.
")
In most of my gallery walls, you’ll find symmetrical items flanking the ends. For my summer gallery wall , I chose to use the French lavabo as a focal point in the middle and worked out from there.
Instead of using the symmetrical items at each end, I used one large item in the middle to give the gallery wall arrangement a visually stable focal point.
Symmetry offers a settled look in decor while asymmetry gives character and often a more curated look. Those are not official design opinions. I didn’t even Google the terms to see if I’m correct from a design-world perspective. But, it’s what I have figured out that I love and remember? That’s all that counts in YOUR home too. Whatever you love!
")
Two Styles of Gallery Wall Arrangement
There are many more than two. These are just the two arrangement formulas that I fall back on!
Once you have experimented with your space and gallery wall a few times, you’ll figure out some formulas that work best, especially considering size, scale, dimension, and layout.
I tend to use two different general styles and then vary my decor pieces. By narrowing this down a little, it helps me know a little more what I want to look for when I am out vintage hunting, so that is really helpful too!
First Arrangement I Use for a Gallery Wall
One of the ways I often style my wall is to choose two larger items to flank each end of the gallery. I have a couple sets of large, vintage mirrors that work especially well. Architectural salvage is also a great option. I’ve thought about playing around with a DIY sconce, kind of like the ones we made HERE. Depending on the size of your wall, of course, will determine the size and scale of these symmetrical pieces.
")
Between the two symmetrical pieces, I arrange my other choices. I love old signs, so most gallery walls have a vintage sign of some kind! Vintage artwork, empty frames, and baskets with greenery are some of my favorite choices. Really, I just play around with these pieces until I get an arrangement that I like.
Remembering the decor triangle and working in three’s can really help you get the larger pieces arranged. I also try to make sure the gallery wall arrangement is balanced. While the pieces don’t have to match, I try to make sure there is a balance of color, size, style, and texture throughout the gallery wall arrangement.
Second Style I Use For a Gallery Wall Arrangement
The other way that I use most frequently for arranging a gallery wall is to choose a centerpiece, much like I would for a big tablescape! Usually substantial in size and a statement piece, whatever I choose becomes the focal point for the entire gallery wall. This is often a piece that is seasonally-related or can be styled with seasonal items.
")
After laying out my centerpiece, I will choose other items, usually smaller in size, to strategically place on each side. Though the pieces don’t have to match on each side (in fact, I prefer that they don’t), it should be balanced. In my summer gallery wall, you can see that the large sign on the left is balanced with the large artwork and linen flag on the right side.
I love that there is one thing on the left and two things on the right…still working in groups of 3!
I finished off this gallery wall with small, framed grain sacks and vintage art. Again, always working toward balance. One vintage art on the left and one vintage art on the right.
")
Once the big pieces are in place, you can give your gallery wall a well-curated look by adding all the fun details. I used several of these same pieces in my summer gallery wall last year, yet by arranging them differently, I get a whole new look.
Mixing and matching decor is my favorite way to enjoy great pieces in lots of different ways and for different seasons. Plus, it helps my decor budget. A LOT!!!
What about all the holes left on the wall?
I always get the question, “Don’t you have a lot of holes in your wall?”
Yep. I sure do! Having a distressed shiplap wall works perfectly because small nail holes don’t really show up. There’s already a lot of “character” going on. After four years in this home, we finally did fill nail holes and touch up the paint this spring. Not so much that we really needed to, but it was good to have a fresh start.
If you’re working with drywall, that of course shows holes much more quickly. Command strips and even hooks work great for small items. Tack nails are what we use and they leave such tiny holes. If you’re doing gallery walls often, you’ll likely cover most of the holes with the next arrangement. Then plan once a year or so to fill the holes, give it some fresh paint, and let the fun continue!
")
Experimenting and playing around with decor can be so much fun! Enjoy the process of decorating and the end product will only be that much better!
I hope this post either gives you a new idea for your gallery wall or perhaps inspires you to give a gallery wall a chance! Most of all, I hope you’ve been reminded to have fun with your decor!

For more fall decor ideas, head on over and check out these inspiring posts from these blogger friends. They are all super creative, and will have you looking forward to fall in no time!
Blessings,


Gallery

Great information. Thank you.
Wowza! Robyn, I just love everything about this. Each piece you chose and the placement is just perfection.
Oh how I love this! You have inspired me to create a gallery wall. Hugs to you.
Great instructions once again! Thank you for sharing!
Now I want to make a gallery wall. Yours are fabulous. Thanks for the inspiration.
Oh, Robyn! This is my first fall to have a sectional in my family room which is screaming for a gallery wall! I love all of your tips and info on how to begin this. And thanks, for reminding me that it should be about us. Adding this to my list of things to recreate in my home. Thanks, as always, for your inspiration. Faithful follower here!
Does it matter the size of a wall if deciding to do a gallery wall? My only choice is a 5ft wide wall
Robyn this is a showstopper. I love it all and the gourds and large pears are stunning. I need to find them. NJ doesn’t have these beautiful gourds. Although they have them in all color in pumpkin shape that i can’t get enough of.
Love your gallery wall and thanks for all the tips. Sometimes it’s easy and other times I just can’t get it right, these tips will help.
Your gallery wall looks fantastic, and your post is a great read filled with great tips and tricks. Thanks for sharing.
Oh Robyn, everything you do is amazing!! I knew that tablescape in the new Am. Farmhouse Style mag was you before I even saw the name!!
Love them all! You have become the Master gallery wall designer!❤️
Your home is so pretty Robyn! Thanks for all the tips. Happy Friday! Julie
Oh I need help with putting together a gallery wall! This is so beautiful!
Your gallery looks amazing Robyn – I have been getting my mantle all ready for fall, too.
Great tips! Looks gorgeous!
Robyn, Your wall looks wonderful in all of the different styles that you have done on it. I would love to mix up a gallery wall on a regular basis, if I had one too! Unfortunately, I don’t have too many walls in my home, but that is okay, that means more windows for light! Pinned! Thank you so much for joining in this inspiring hop!
I’ve honestly never thought about changing a gallery wall seasonally, but that’s a good idea. I’m kind of tired of mine. I think we are all too afraid of the holes in the wall. You’re right. I love the chipy french sink. What a great find on Etsy! So glad for the chance to discover your blog.
Wonderful! Love the ideas you have shared here! Can’t wait to put a gallery wall up myself! Thanks so much!