How to Make an Easy New Year’s Eve Centerpiece

Looking for a simple way to decorate for New Year’s Eve? Check out this easy New Year’s Eve centerpiece idea you can quickly create this year!
I’ll admit, I’m not one to do a ton of New Year’s decorating. Most years, we are still celebrating Christmas with extended family. On the off chance that we aren’t with extended family, I usually have a bit of a mess on my hands, cleaning up Christmas decorations, and preparing for winter!
So, if you’re in the same boat as me and need a super easy New Year’s centerpiece for a New Years Eve party this year, you’re in luck!
What I love about this festive table centerpiece is that you can use it even if your Christmas decor is still up. However, even if you’ve cleaned up all the Christmas and have a clean slate, this will add a little sparkle for a New Year’s Eve party! Simple, wintery, and a touch of sparkle is my goal for a simple New Year’s Eve celebration!
How to Make an Easy New Year’s Eve Centerpiece
What you need to create an easy homemade centerpiece for New Year’s Eve:
Hint: Leave out just a few Christmas items from your holiday decor for a festive touch!
")
- Large bowl (I used my vintage French tian bowl. A dough bowl would work too!)
- Battery-operated pillar candles
- Sprigs of faux winter greenery (if your fresh greenery is still hanging in there, go for it! Mine is always crispy by December 26th!)
- Gold, silver, white, mercury glass, or clear glass ornaments
- Faux winter garland (again, use your fresh greenery if it still looks good!) I also love to mix in rosemary garland and eucalyptus garland!
- Brass candlesticks
- Battery-operated taper candles
- Twinkle fairy lights (I love the ones with a remote and timer!)
- Vintage-style bell garland (My exact one is sold out. However, you can quickly tie these on a jute string or just tuck them through your centerpiece!)
- Mercury glass votive cups
- Battery-operated votive candles
How to make stunning centerpieces for New Year’s Eve:
After gathering your materials, you need about 10 minutes!
")
#1: Start with the bowl
First, I started with my large bowl in the middle. If you don’t have a bowl, a pretty tray or even a cake stand would do the trick too! Next, I arranged the pillar candles in my bowl, putting them right next to one another and fitting in as many in different ways as I could!
I like THIS candle set because it has a variety of heights. If your candles are all the same height, no worries! Just use some little bowls or blocks of wood make different heights! At the same time, I also like using the battery-operated ones so that it can be going all evening. Then, I don’t have to keep an eye on it for safety!
#2: Add greenery
Secondly, I used some little sprigs of faux winter greenery to tuck around and fill the empty-looking spots. You could also use real greenery. If you don’t have cedar, eucalyptus would also be a pretty choice!
Tip: Cut the eucalyptus garland into small sections to use for filler greenery!
Then, on each side of the bowl, I laid my winter garlands. I especially love mixing the cedar or pine with eucalyptus. It makes it nice and full and a little less “Christmas-y” too!
")
#3: Add Candlesticks
Next, I added brass candlesticks and battery-operated candles. This is another great way to keep that cozy glow all evening (even past midnight if you’re ringing in the New Year!) in a safe way.
Tip: I watch for brass candlesticks at thrift stores and flea markets! I like to mix and match the heights and styles for a vintage look!
Tip: Usually, candlesticks work best in odd numbers. So, try adding a odd number on each side of your large bowl. For a more curated look, avoid making each side “match” exactly.
Additionally, I added some vintage books to give some additional variety to the heights of my candlesticks. The books add some extra character and texture to the centerpiece too!
How to Decorate a New Year’s Eve Party
Mercury glass is the perfect color and finish for New Year’s Eve, so I added these mercury glass votive cups throughout my centerpiece too. I love the bit of sparkle they add while still blending with my vintage pieces!
")
#4: Use fairy lights
Delicate fairy lights are not just for Christmas and the touch of twinkle and cozy glow can last well past December 25th! I love to keep fairy lights out in my winter decor.
Next, I added one strand of battery-operated fairy lights, tucked around all of my centerpiece elements. They add some twinkle. At the same time, they offer a cozy twinkle too!
#5: Incorporate Christmas ornaments!
For a final touch of sparkle, I added some vintage Christmas ornaments. Lastly, I love how they add shape and texture to the centerpiece and how the light reflects.
Any kind of metallic colors or mercury glass ornament would give you this same affect. For this purpose, save a few pretty ones when you take down your tree. Even if you’ve already packed yours away, check the clearance aisles for after-Christmas sales! You can use them for an easy New Year’s Eve centerpiece too!
")
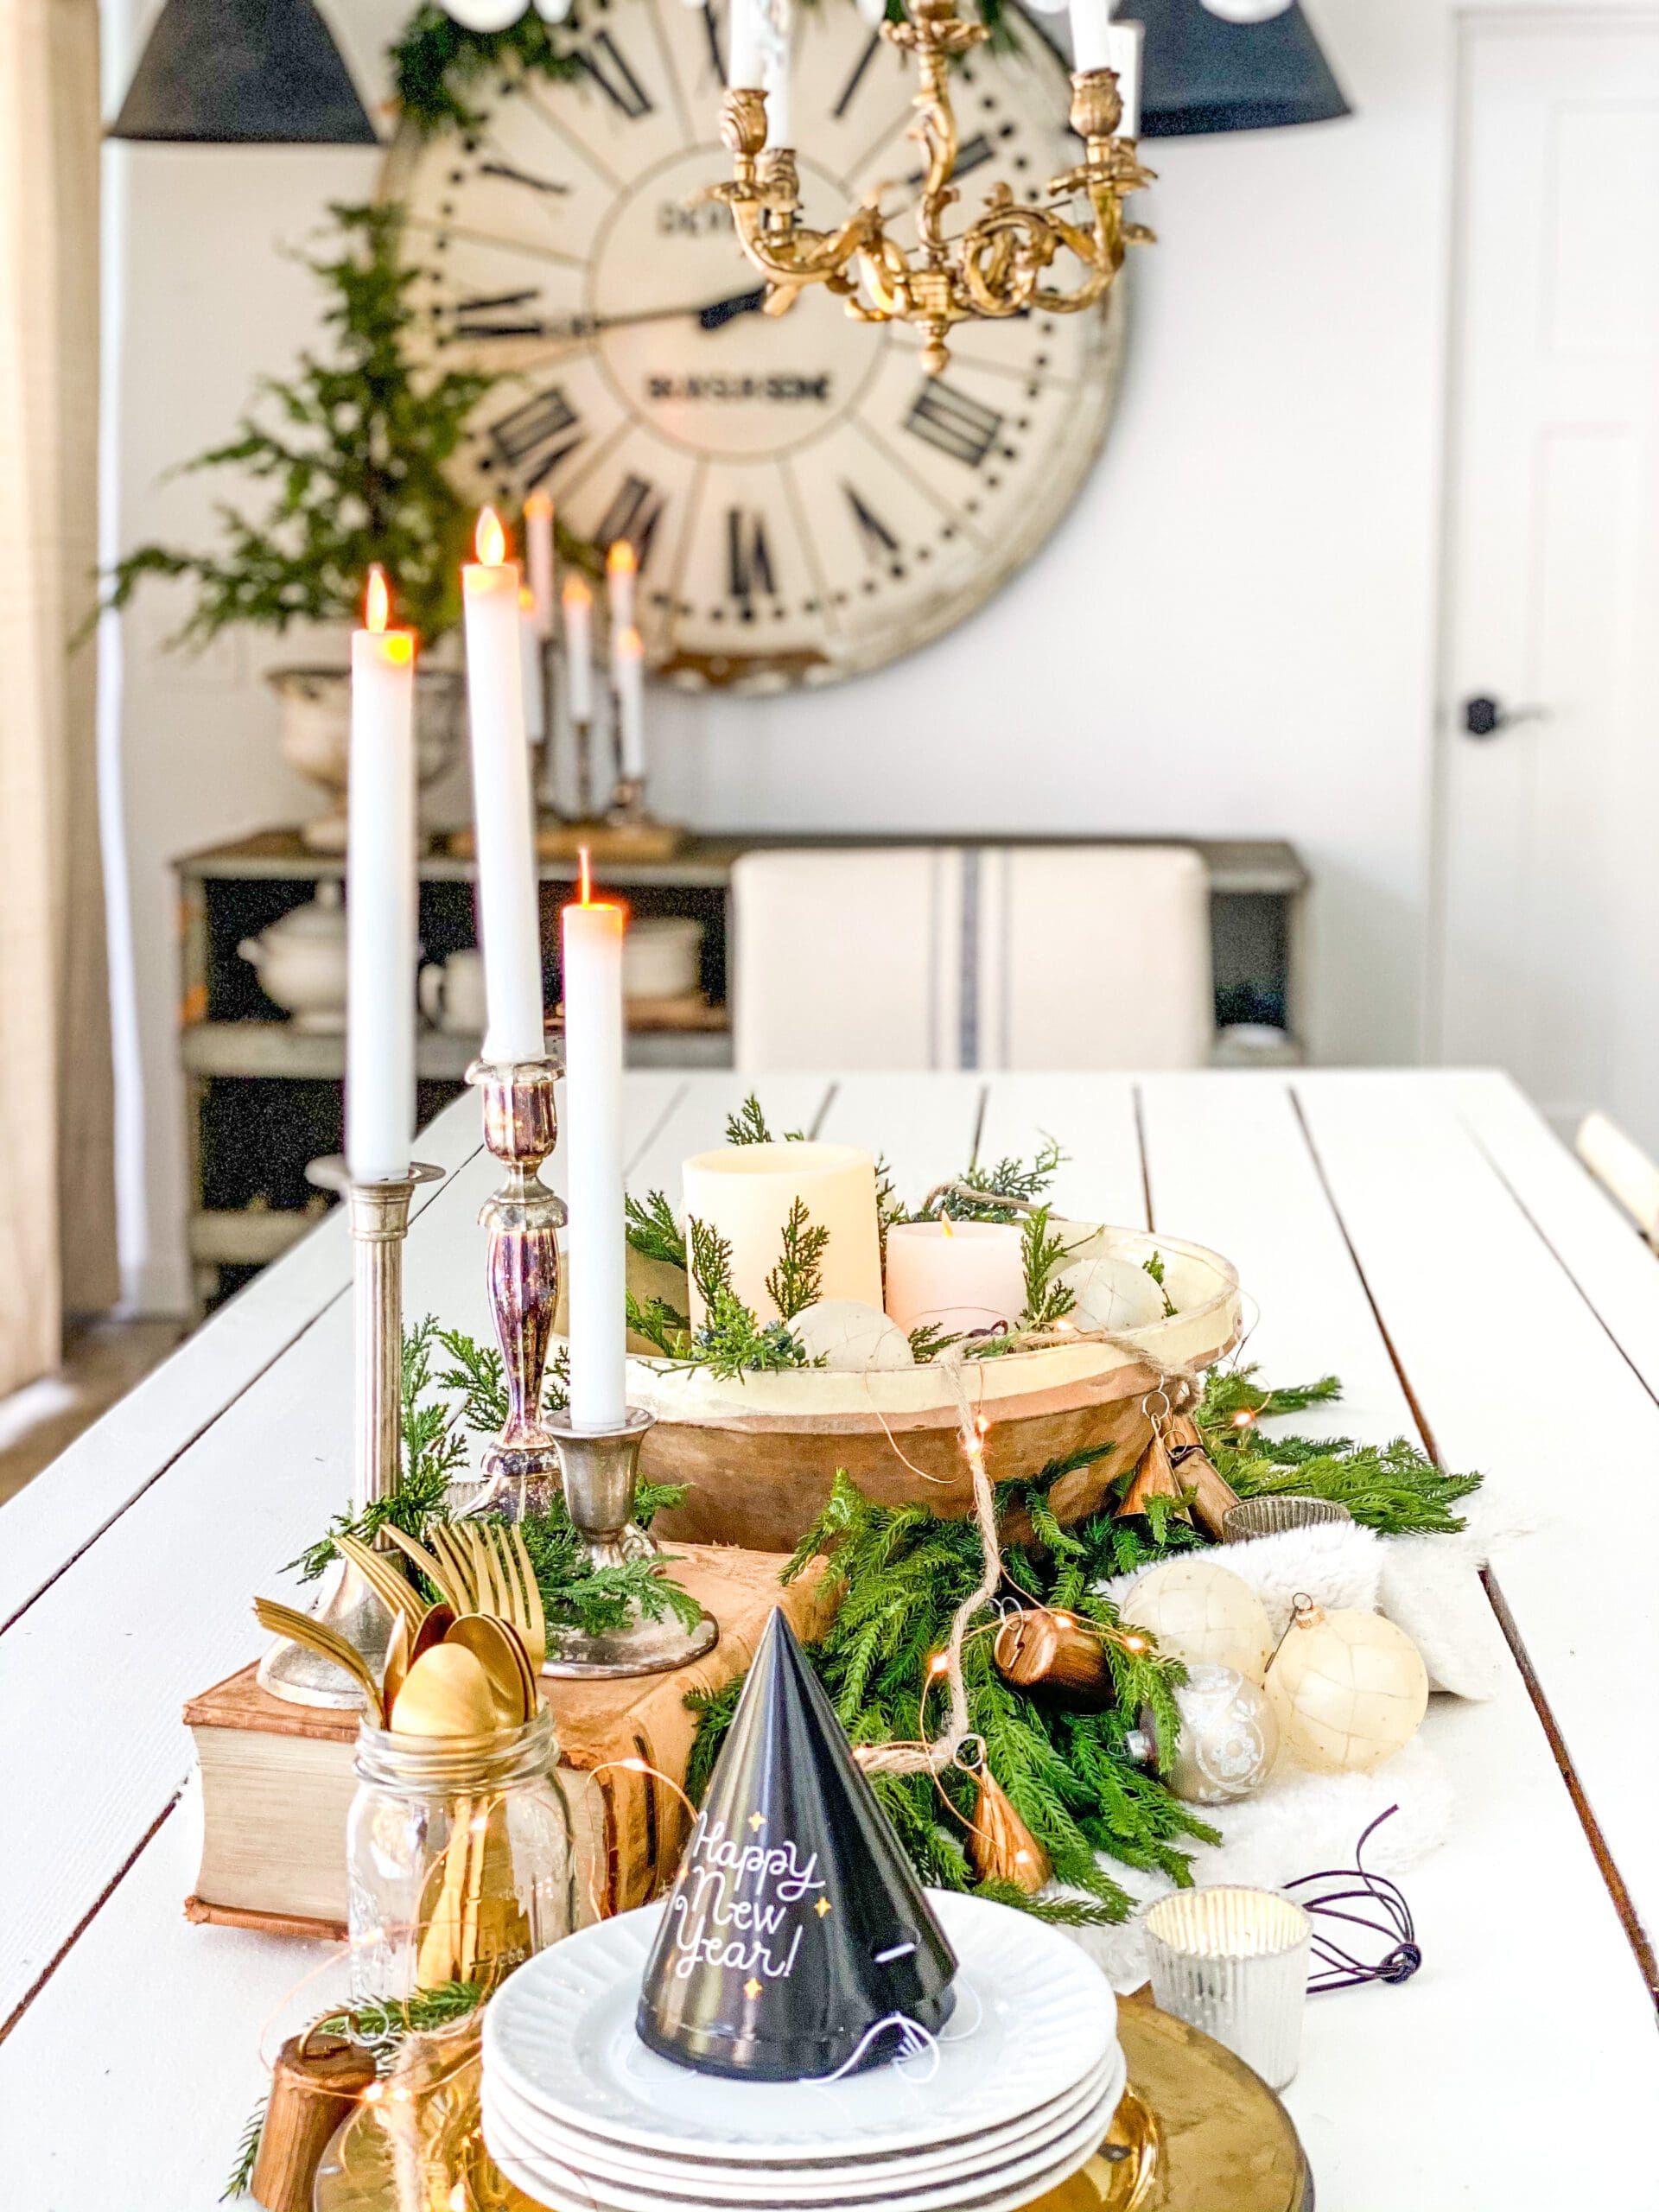
#6: Add party supplies!
I added in a stack of dessert plates, ready for some New Year’s Eve snacks. However, these little party hats were the icing on the cake! The kids thought they were a great idea! At the same time, they add just a little touch of a party look to the centerpiece too!
You can find some other cute party decorations to match HERE!
")
How to decorate your home for New Year’s Eve party?
#1: Pick a focal point.
First of all, I suggest focusing on one area. Unless you are hosting a big bash and plan to go all out in every area, you can concentrate your resources on one main area where you’ll be hosting. For example, if you are hosting a New Year’s Eve dinner party, you may want to focus your attention on New Year’s table decorations, such as this easy centerpiece I shared. After all, New Year’s tablescapes can be simply achieved with white dishes, gold accents, and a beautiful centerpiece with lots of warm glow from candlelight!
However, if you’re hosting a game night, you may want to add some New Year’s Eve party decorations to the living room or recreational space too. At the same time, consider choosing a focal point, such as the mantel, for festive cheer that takes little time to execute!
#2: Create a spot for memorable pictures!
To simplify a photo backdrop, choose a pretty scene in your home. At the same time, if your Christmas tree is still up, it makes a great photo backdrop!
For example, have guests hold a large, empty gold frame with their faces showing through. For a fun activity, you can have family members help you cut out large numbers for the year. Next, use double-sided tape or a hot glue gun to attach them to wooden skewers. Then, if you want to use even more little time, check out THESE fun New Year’s photo props!
#3: Sprinkle in some fun!
Balloons are always fun ways to add some festive cheer! If you plan ahead for it, order some of THESE confetti balloons. You know the kids will have the best time popping them when the clock strikes midnight! The fun of the gold confetti raining down will be worth the clean up! However, if you are running a last minute operation, you can get gold and silver stars at the dollar store for a festive look and little cost! I use the cute star helium balloons for so many special events around here!
How to decorate New Year 2024?
Try any of these easy accents for your next New Year’s Eve party!
- Clock faces (These can be really beautiful to add to table settings on the dining table or hung on a Christmas tree to make a New Year’s tree.)
- Add a little bit of glitz with a mirror ball, disco balls, or LED lights. You can get them pretty cheap on Amazon!
- Shop after Christmas bargain sales to make little party favors for guests. (Tip: Gift sets are often leftover in the clearance aisles. You can break these up to make several cute party favors out of one set.)
- Use gold spray paint for a quick DIY on thrifted candle sticks, faux fruit, or other decor accessories that are different colors.
- Choose a color scheme for your party decor that goes with decorations you already have. For example, I use a lot of gold in my Christmas decorations, so I can easily repurpose some of these Christmas items for New Year’s decorations.
- Hang streamers or curtains from the party supply stores in metallic colors at the front door. It will make a festive welcome for your party guests!
- Pick up some fresh flowers at the grocery store in colors that match your color scheme. Use mason jars or empty champagne bottles (or sparkling cider bottles) to divide the flower bouquet up into several mini arrangements to sprinkle throughout your spaces.
You can find some other New Year’s Eve theme decorations HERE!
I told you it would be simple but I love the effect! It will be fun to ring in the New Year celebration with our family and party guests. I am already excited about all the hope and possibility that this coming year will bring!
Hopefully this gives you some ideas and inspiration to gather some vintage, greenery, and sparkle to create your own quick and easy New Year’s Eve decorations! Happy New Year (a little early!)
")
Other Posts You May Enjoy:
- Best Ideas for Christmas Decorating with Winter Greenery
- 10 Ways to Decorate a Cozy Winter Bedroom Retreat On a Budget
- 9 Simple Ways to Decorate for Winter and Leave Up After Christmas Too
- 3 Simple Winter Decor Vignettes You Can Make This Season
- How to Make Beautiful Winter Mantel Decor
- The Best 9 Cozy Winter Decor Finds You’ll Love
Blessings,


(As an Amazon Associate I earn from qualifying purchases. Posts on Robyn’s French Nest may contain affiliate links. You can see our full disclosure details here.)
Gallery
So simple and yet so elegant and beautiful!
Robyn! Your tablescapes are always so beautiful and inspiring! I love every single one you create! And this one is no exception!! So glad to call you a friend Robyn!! Happy New Year!! XoXo
Robyn
I love all your suggestions!
Robyn
I love your centerpiece. So many creative ideas.
Your tablescapes and centerpieces are always so beautiful and creative! This one is no exception!!
Happiest of New Year’s to you and your family!! You put so much thought into everything you do…such a gorgeous tutorial!!
Beautiful! I love these ideas. Merry Christmas, my friend.